Built Work · Completed 2026
Home Office Built-In
A spare bedroom became an office, but the closet kept giving it away, and a large printer sat on the floor in everyone's way. Gutted the closet and built a floor-to-header built-in in its place: a base cabinet that hides the printer with permanent power inside it, curved verticals cut on a CNC, a back wall built twice, and 24V lighting routed into the shelf edges. It also spends all day as a video-call backdrop, which was the plan from the beginning.
The Transformation
Before & After
Drag the handle to compare.
Project Walkthrough
Phase by Phase
A Closet Pretending to Be an Office
The room was a bedroom before it was an office, and the closet made sure everyone knew it. A wide opening, a rod, a shelf, and nothing about it that belonged in a room where work happens. The printer is the other half of the problem: it is large, it is not attractive, and it lived on the floor with its cord running across the carpet to the nearest outlet. The plywood in this photo is not a stand — it is a rough mock-up thrown together on the spot to confirm the printer would actually fit inside what was being planned. Gutting the closet was the easy decision. What replaced it had to do three things at once: stop reading as a closet, swallow the printer whole, and still be somewhere you would want to look.
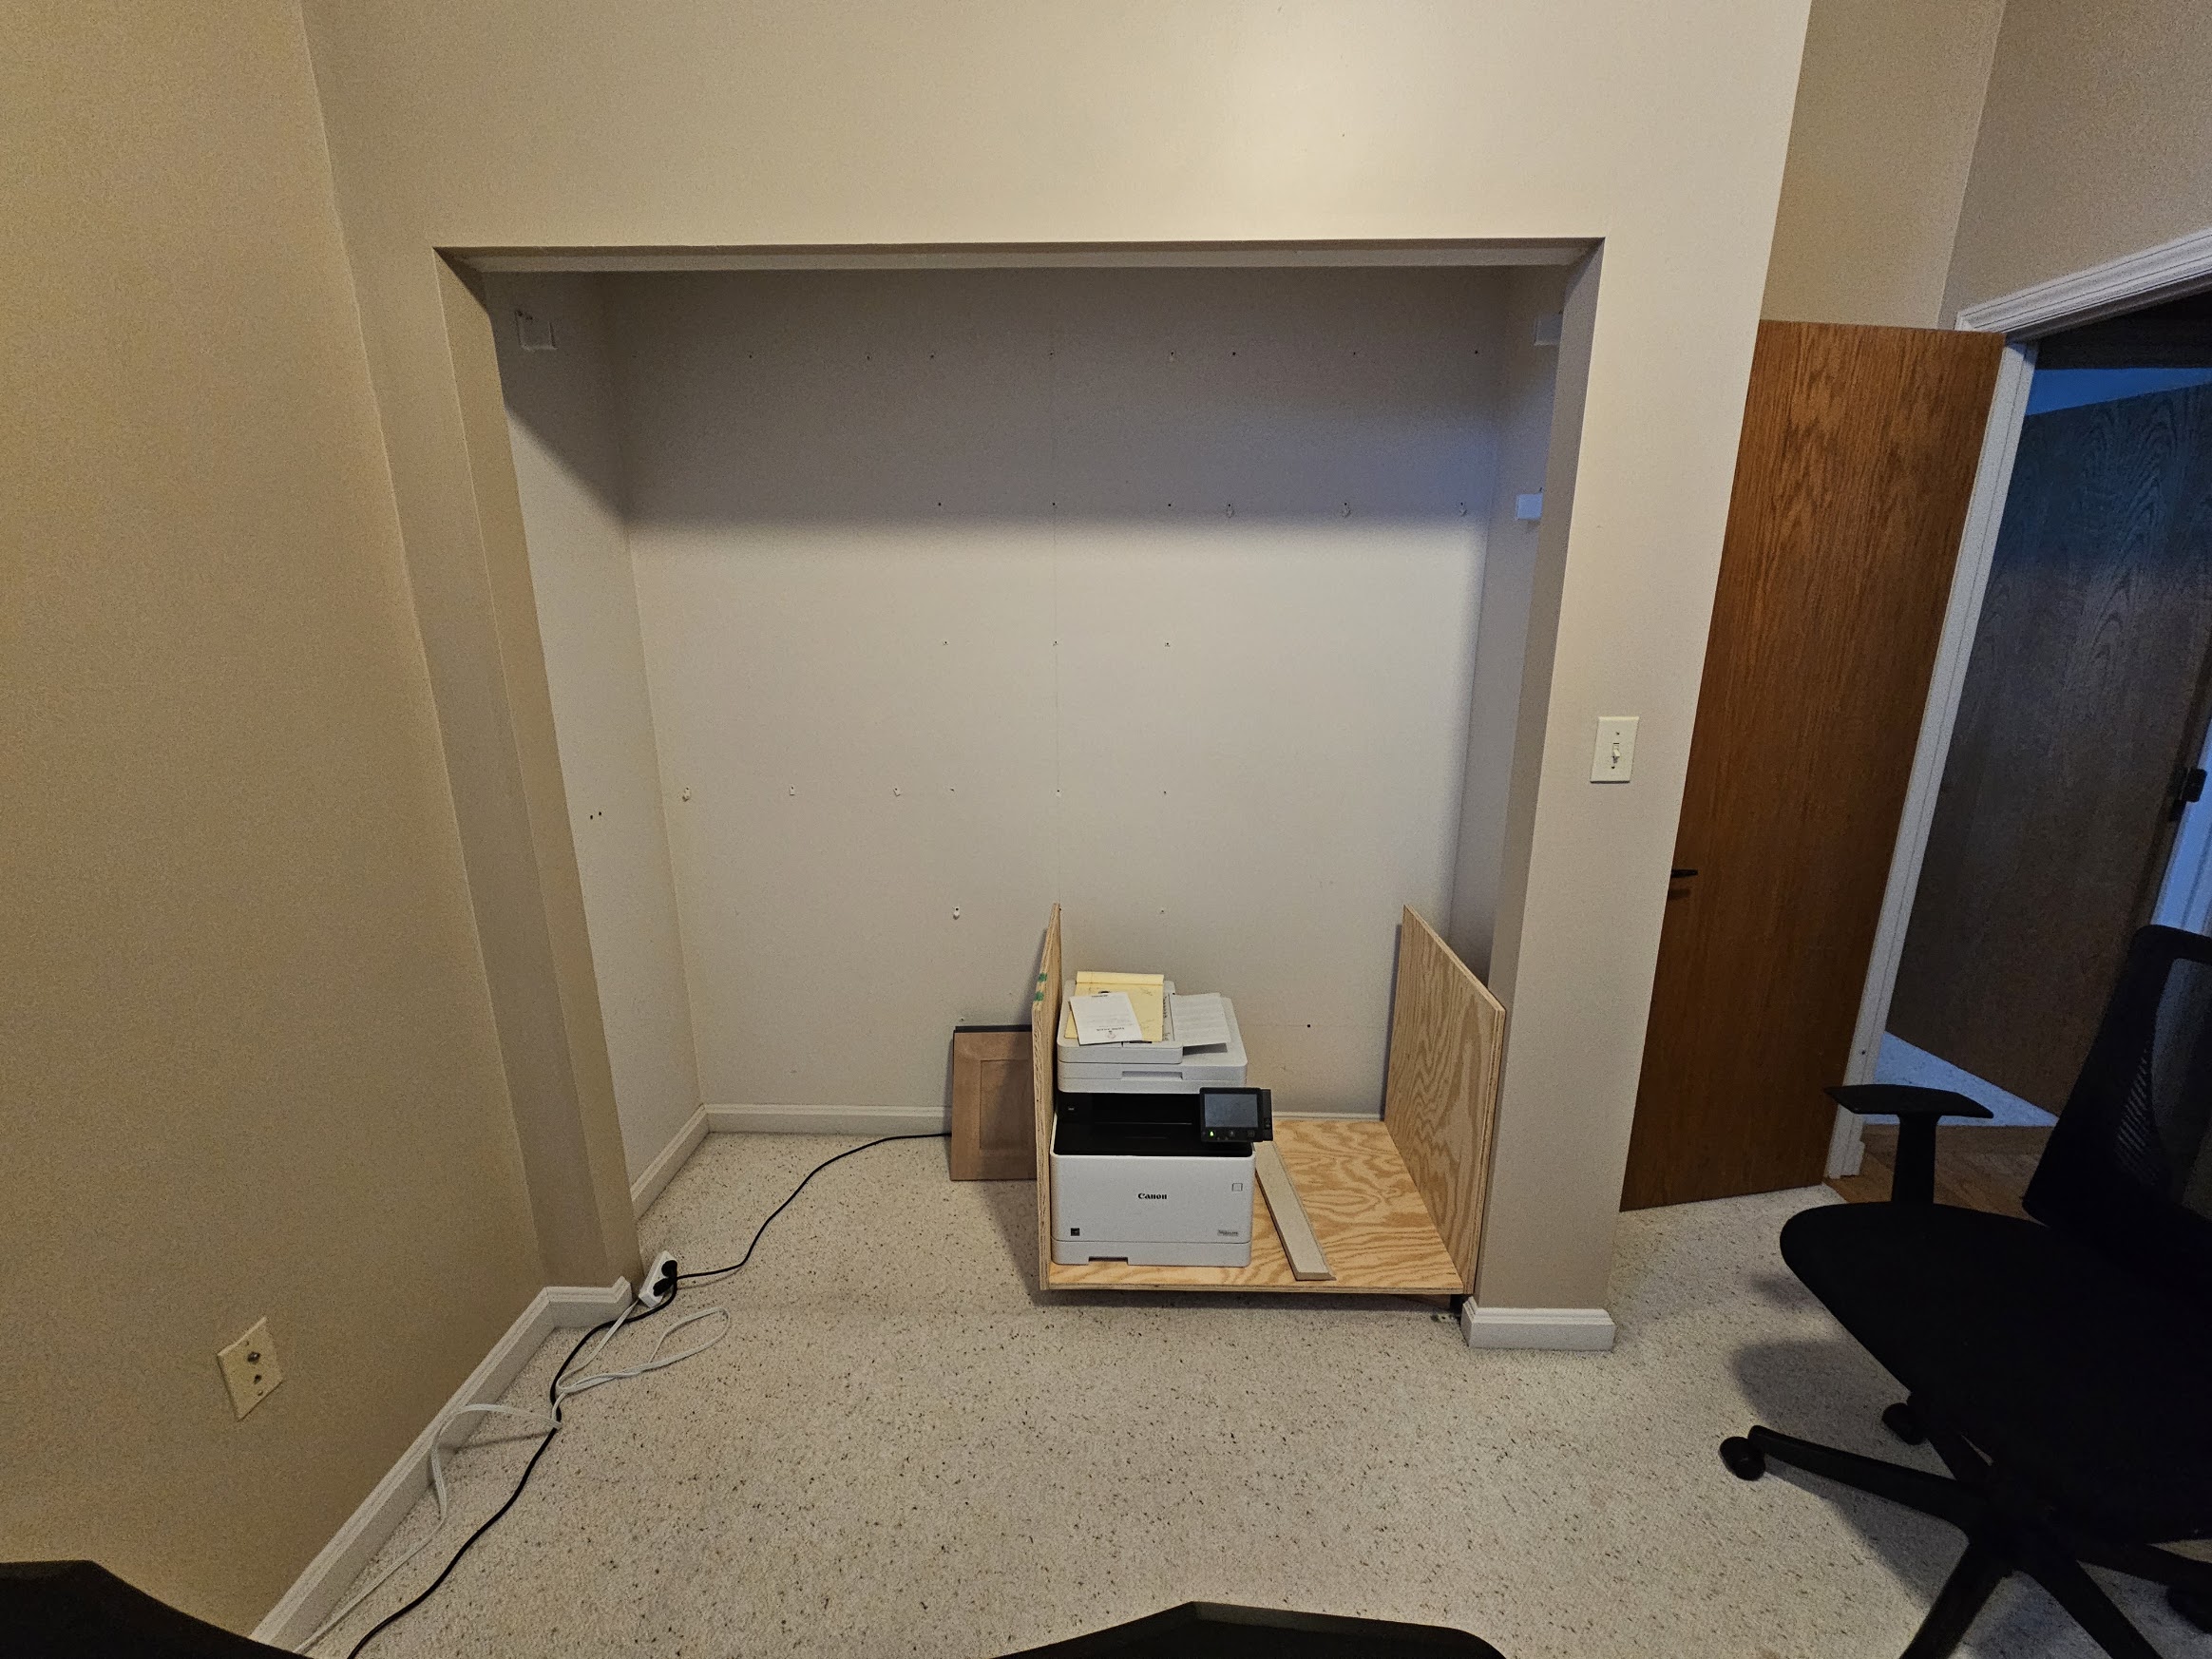 The closet gutted, printer on the floor, and a rough mock-up checking it would fit, February 2026
The Base Cabinet
Two carcasses built as a single run, sized so the deepest thing that had to
disappear would fit with room to spare. Doors hung flat and full-overlay so
the front would read as one surface rather than a row of boxes.
The cabinet is the foundation for everything above it, so it had to be right
before anything else could start: level, flush to the opening, and deep
enough that the doors close on the printer with nothing sticking out.
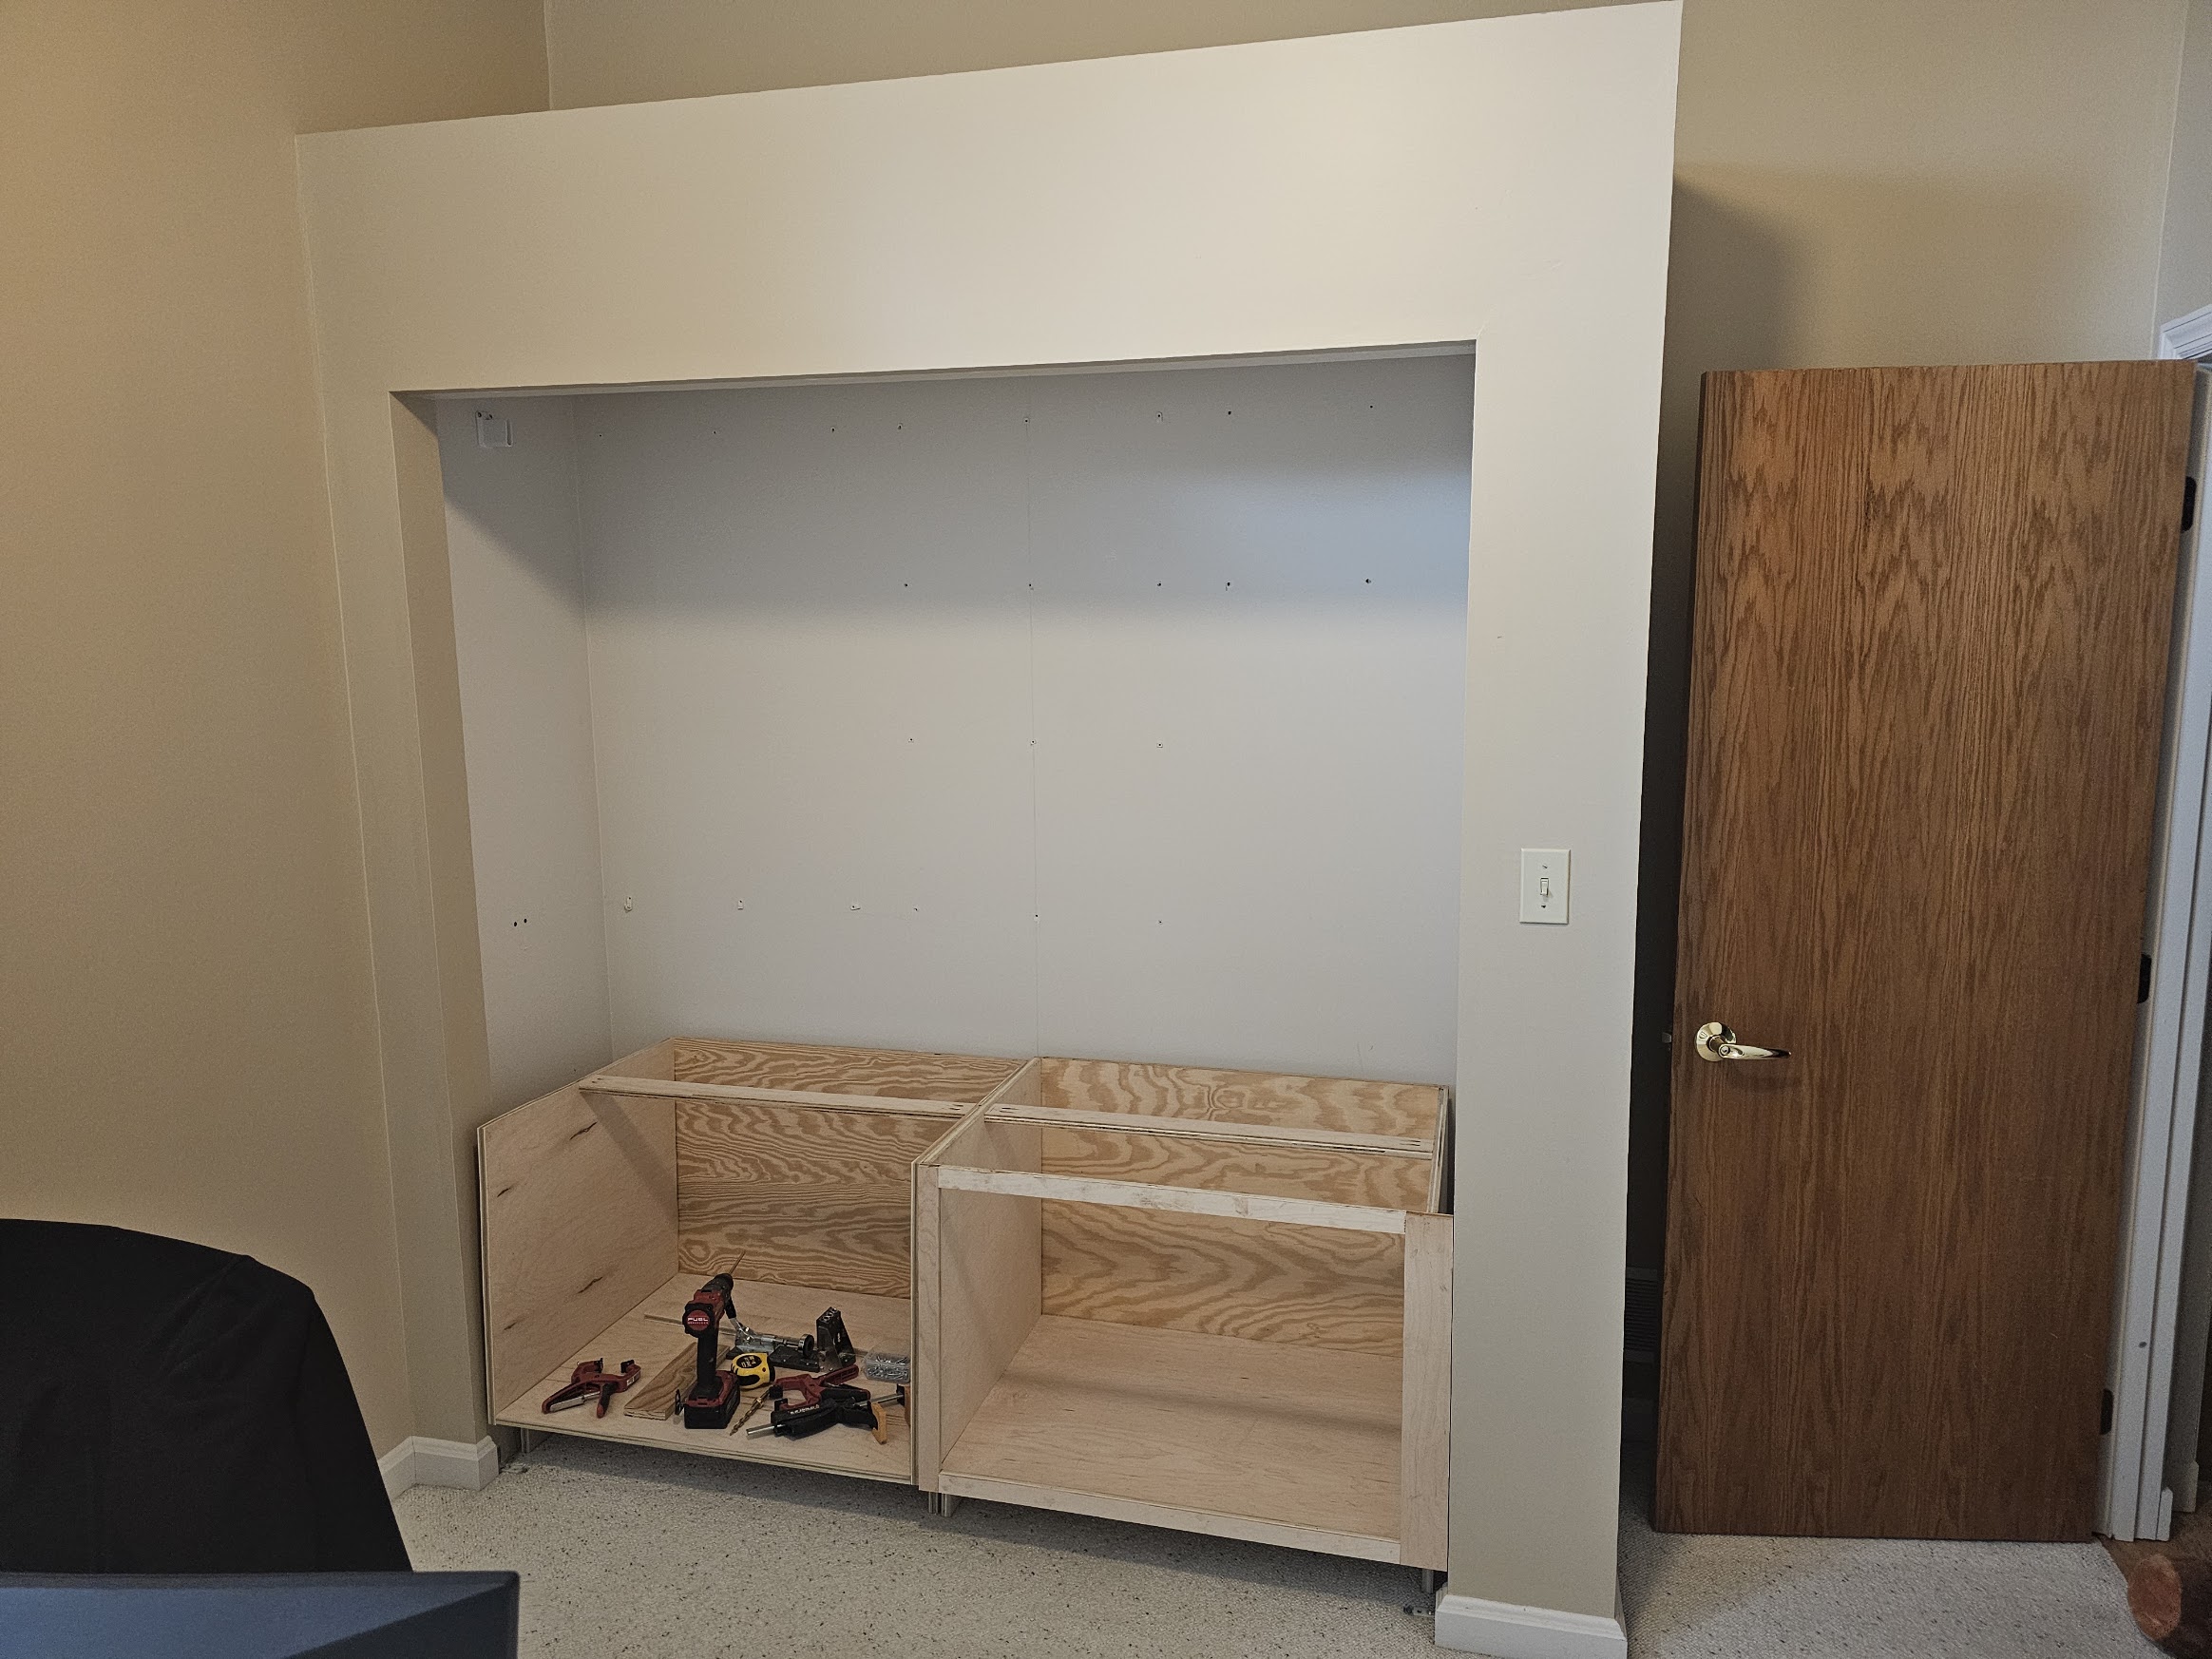 Base cabinet carcasses framed up in the opening, April 2026
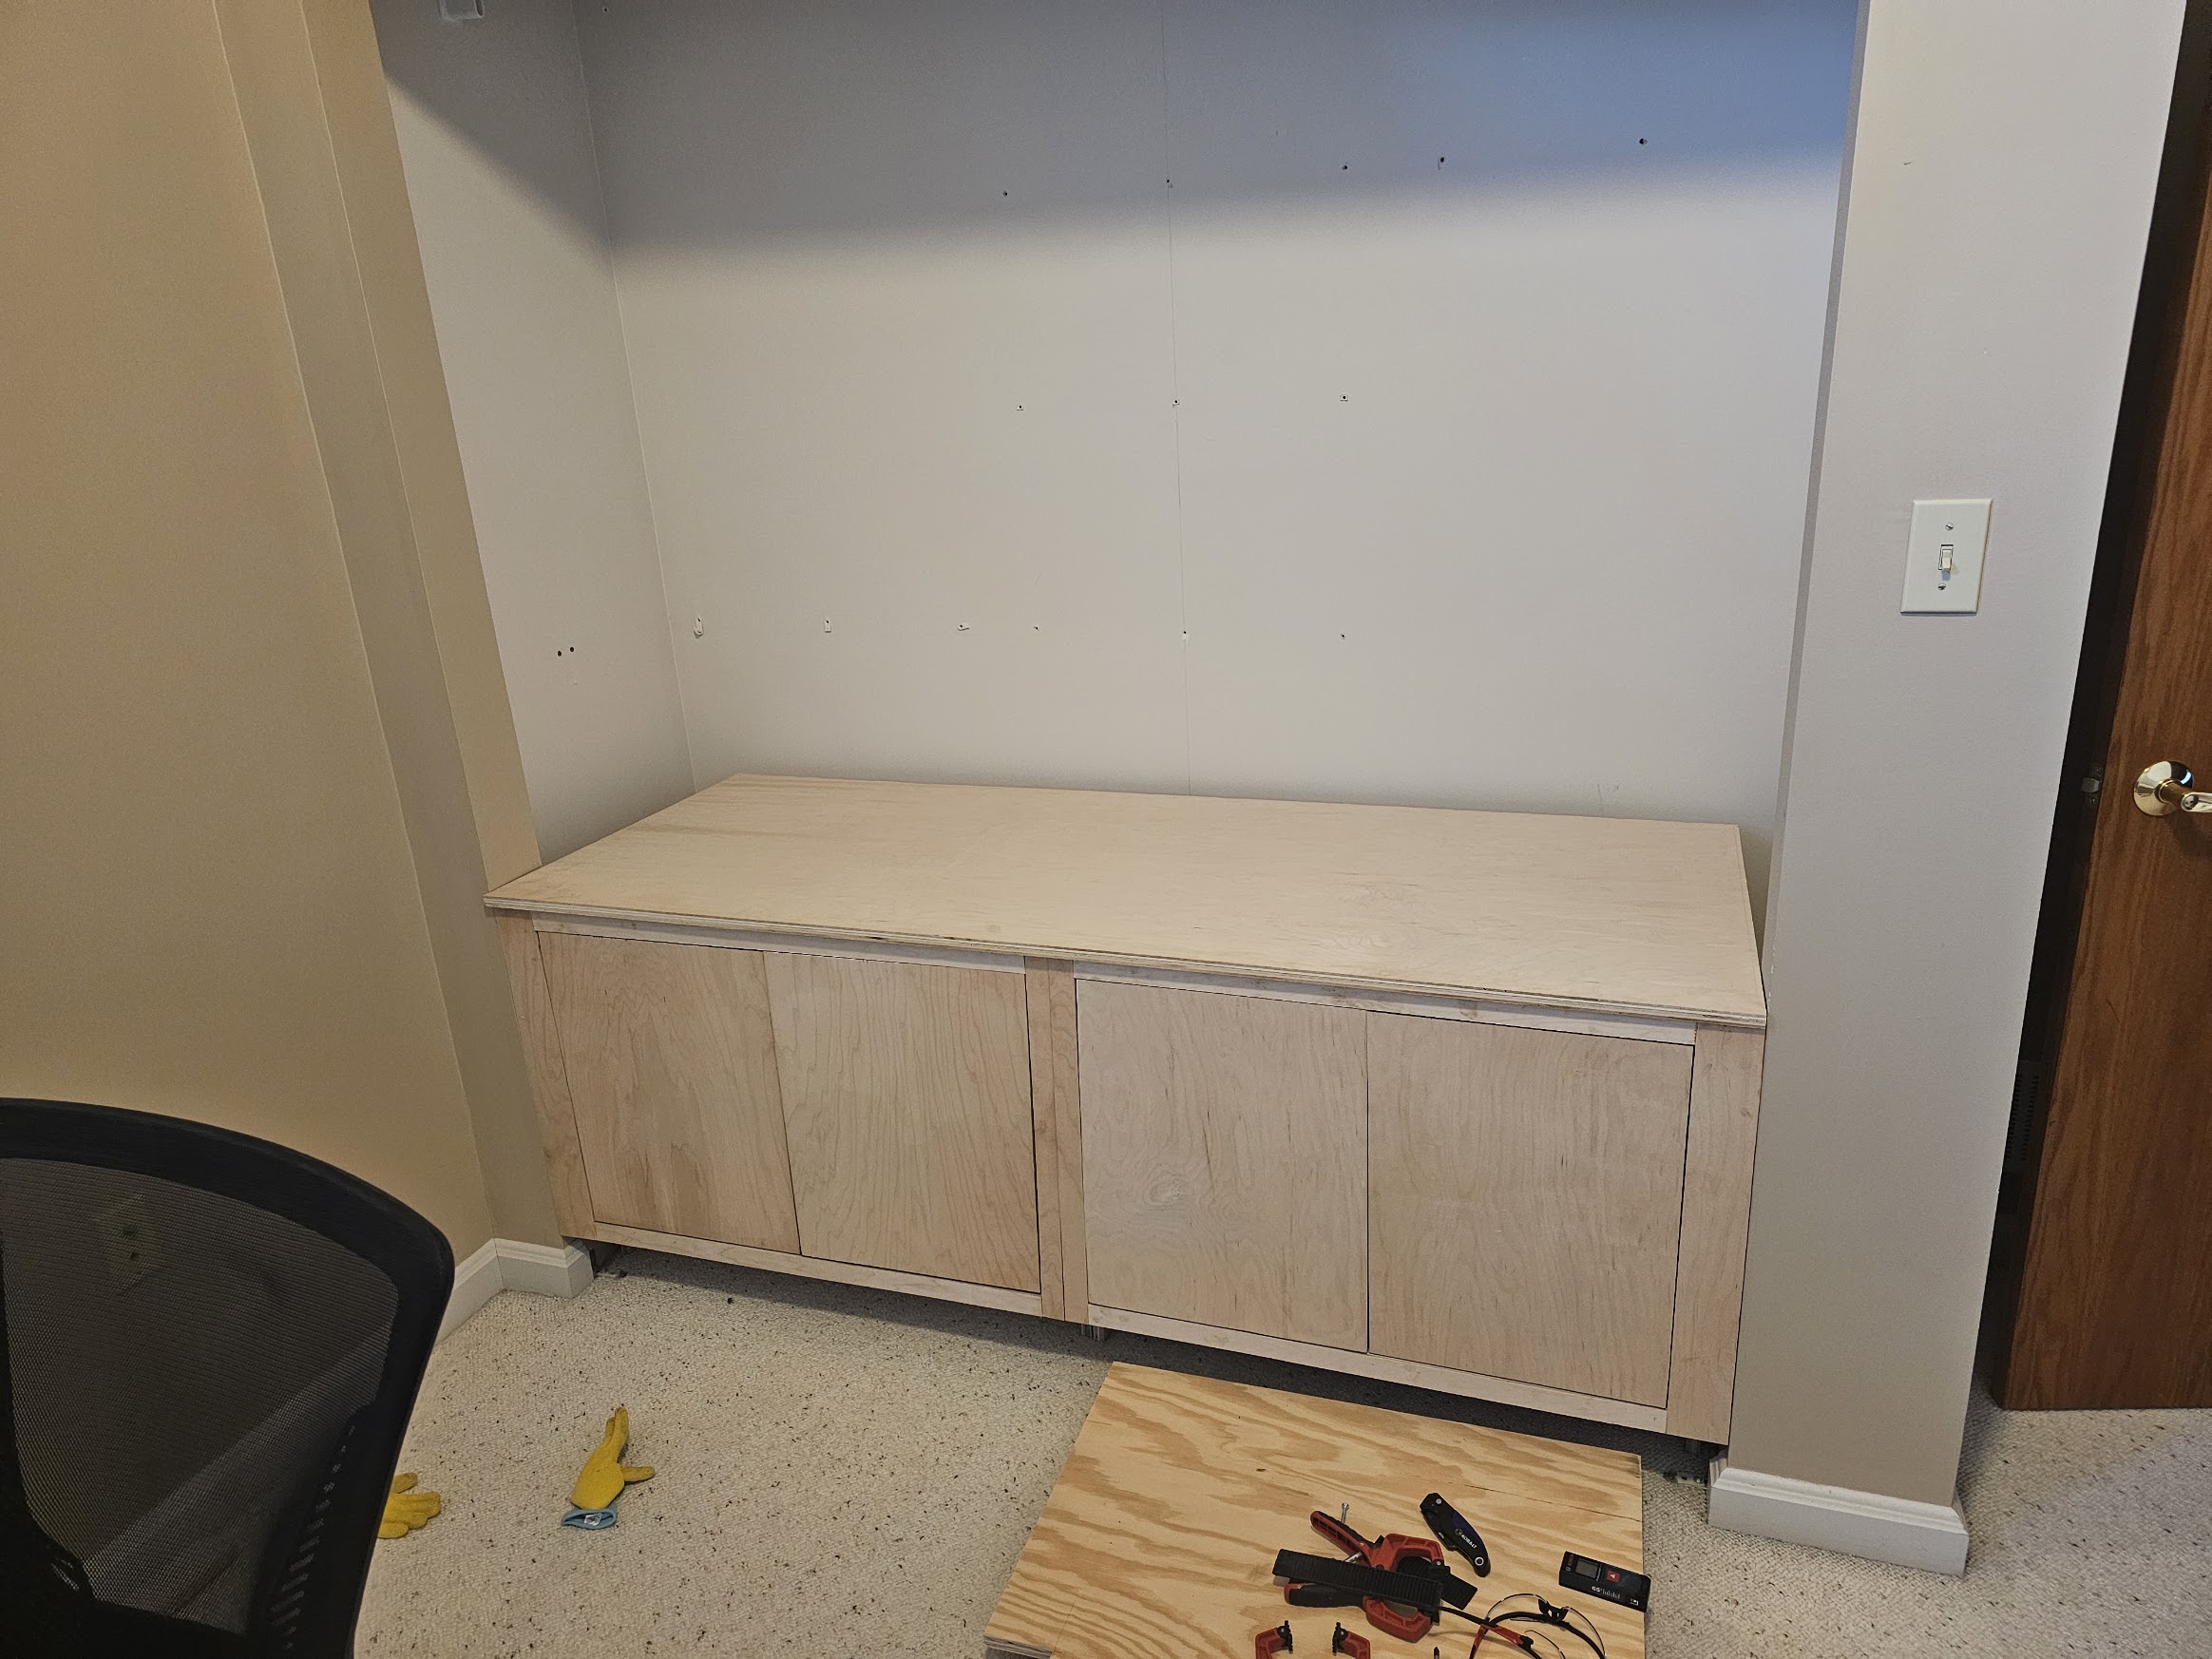 Top decked and the inset doors hung, still unfinished, April 2026
Power, and the Printer
The only power in the opening was the closet light switch, so the switch
became the source for everything. Constant power off the line side runs to a
receptacle inside the cabinet, which is where the printer plugs in and stays
plugged in — no reaching, no unplugging, no cord leaving the box. The switched
leg feeds a second outlet that the 24V lighting supplies plug into, so the
wall switch that used to run a bare closet bulb now runs the entire built-in's
lighting, and anything else added later can borrow from either side.
The test fit is the photo worth keeping. Printer in, doors open, and the
furring strips already on the back wall for the paneling that comes next.
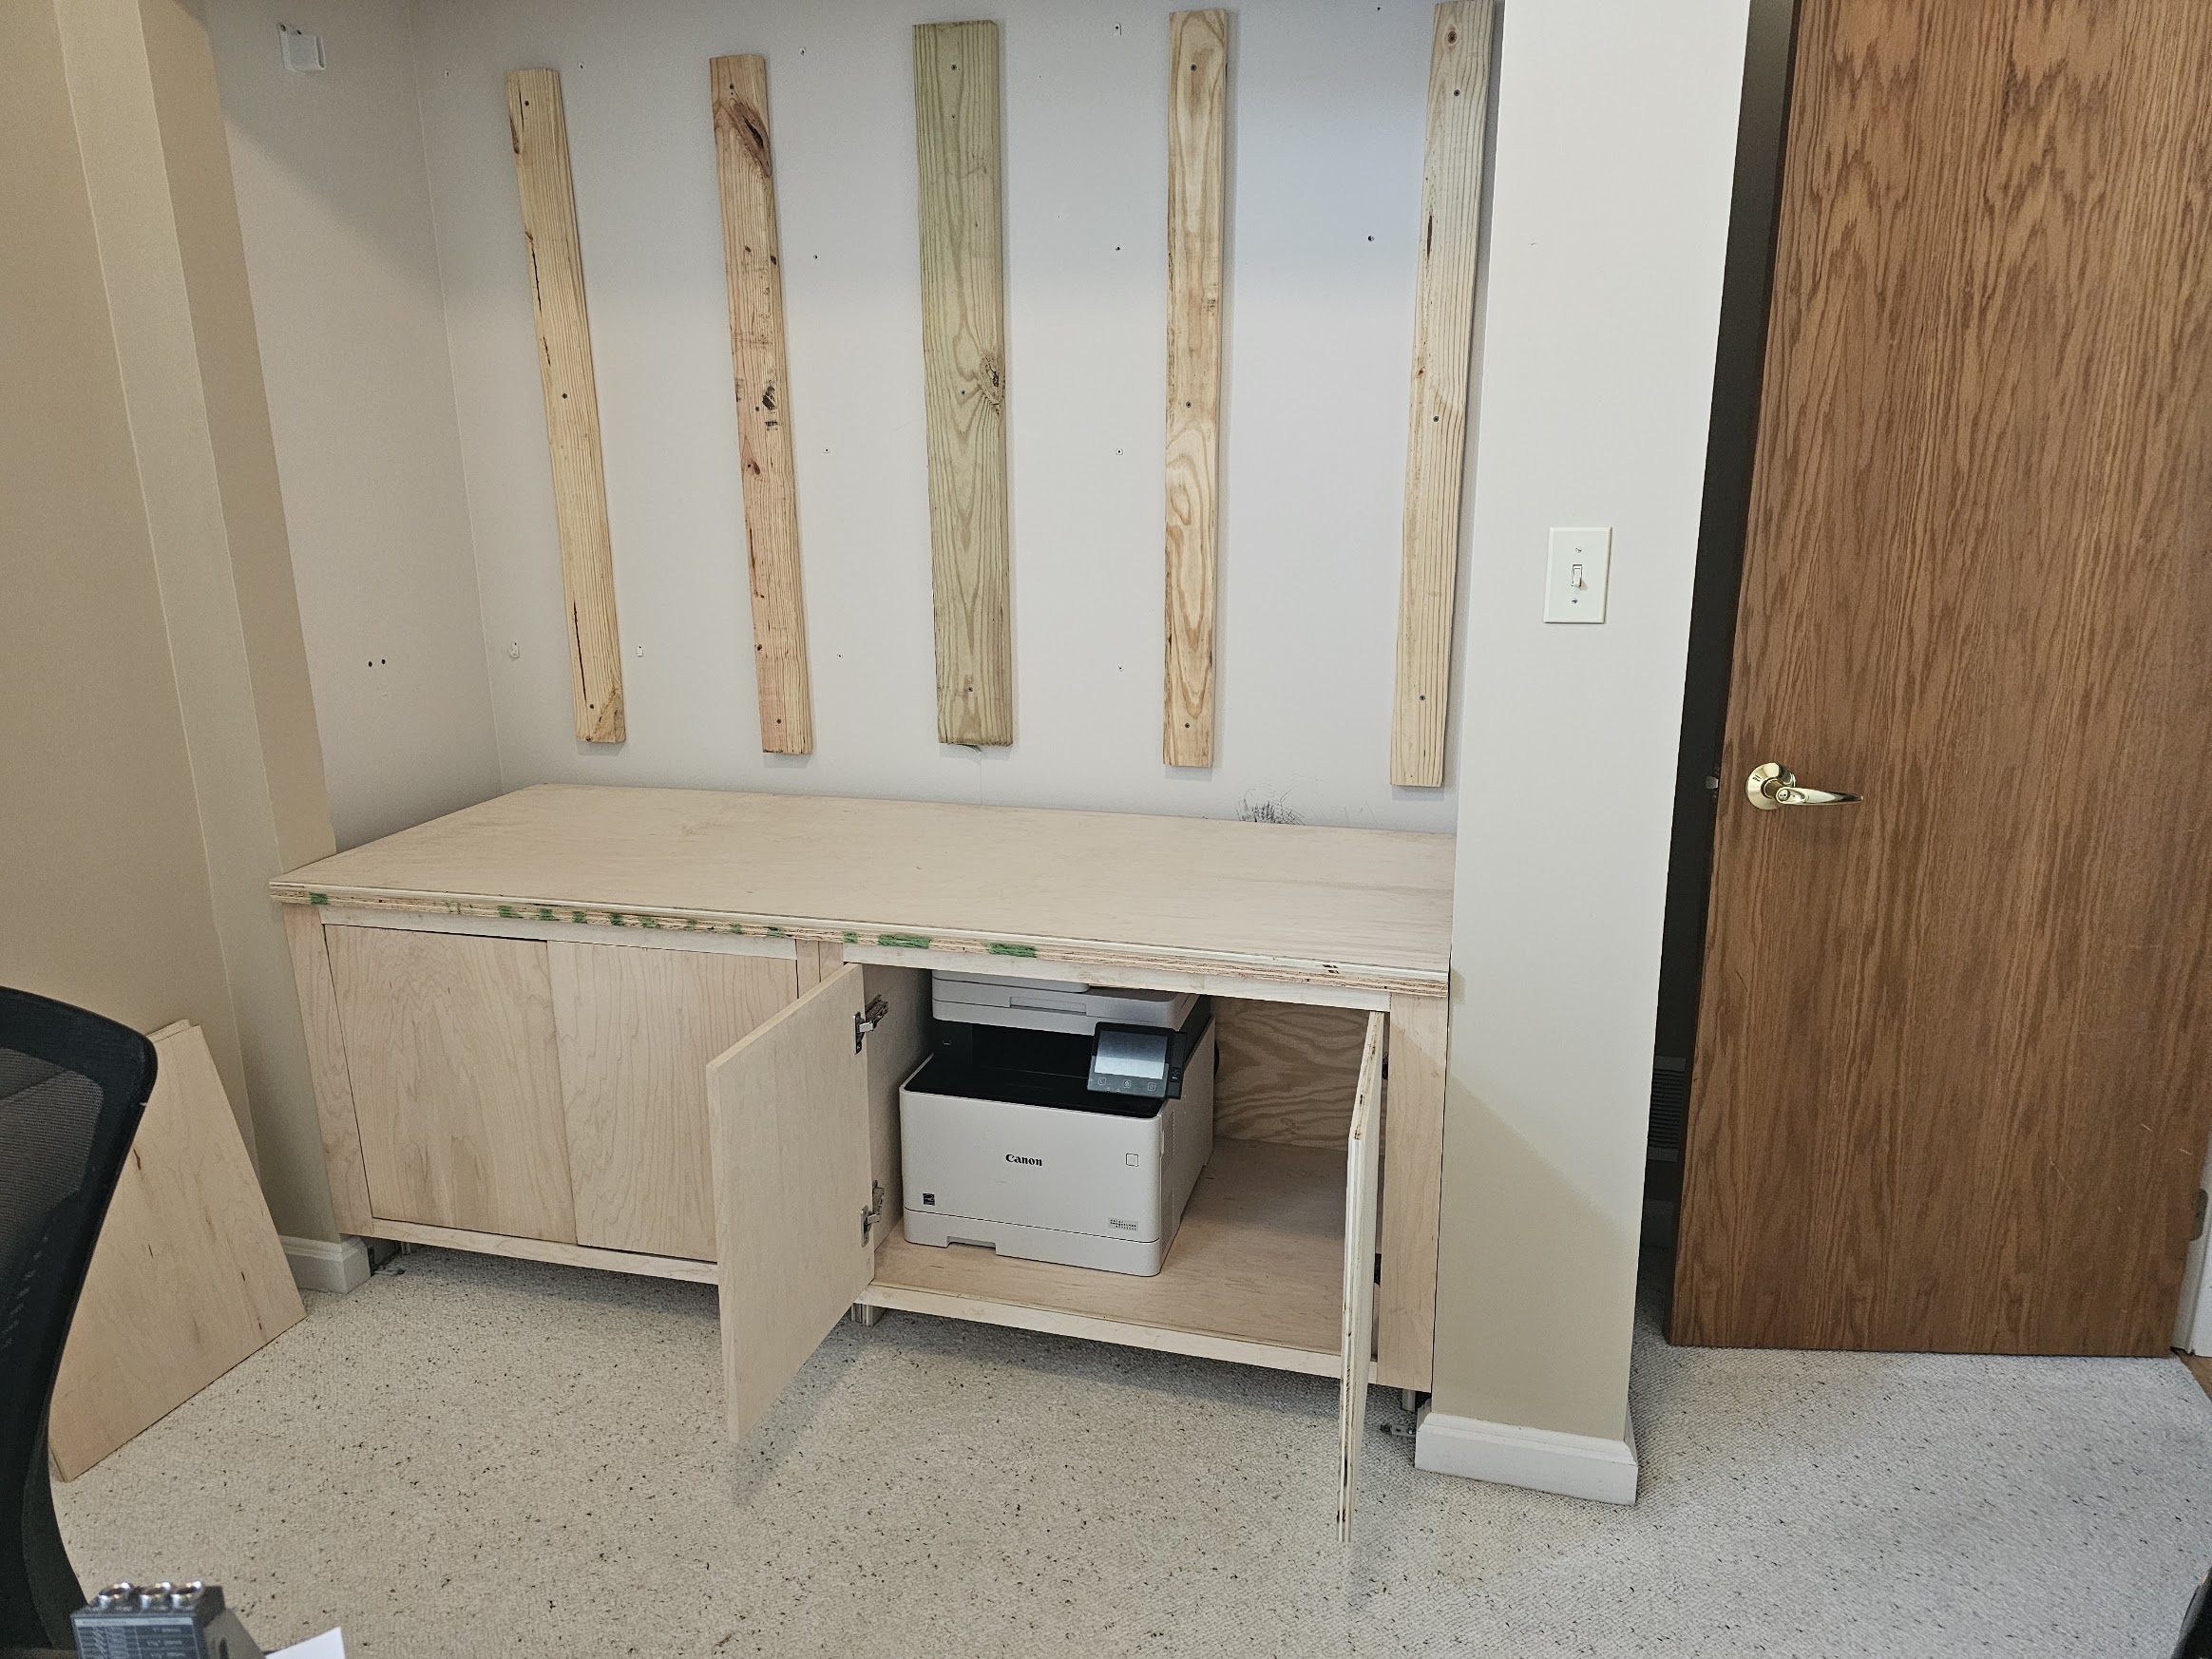 Printer test-fit inside the cabinet with the doors open, furring strips up on the back wall, April 2026
The Back Wall, Twice
The first back wall went up and the seams landed in open field, straight
across the middle of the opening where there was nothing to break them up.
From three feet away it looked like what it was: sheets of plywood butted
together.
The fix came out of a second problem. Material was running short, so rather
than buy more, the answer was to build a new ledge with a raised floor
higher up the opening. That did two things at once: it cut down how much
vertical back wall there was left to cover, and it let the remaining seams
fall exactly where the vertical dividers would eventually stand. The seams
are still there. They are just behind something now.
This is the part of the build worth remembering — the constraint produced
the geometry that solved the flaw.
It also left a tell in the photos. From here on the built-in is stained in
some places and raw in others, and which is which changes from shot to shot.
Finishing happened section by section as things got done, so every time
something came back apart — the back wall, the new ledge and floor — fresh
material ended up sitting next to surfaces that had already been stained.
The patchwork is not the lighting. It is a record of what got redone.
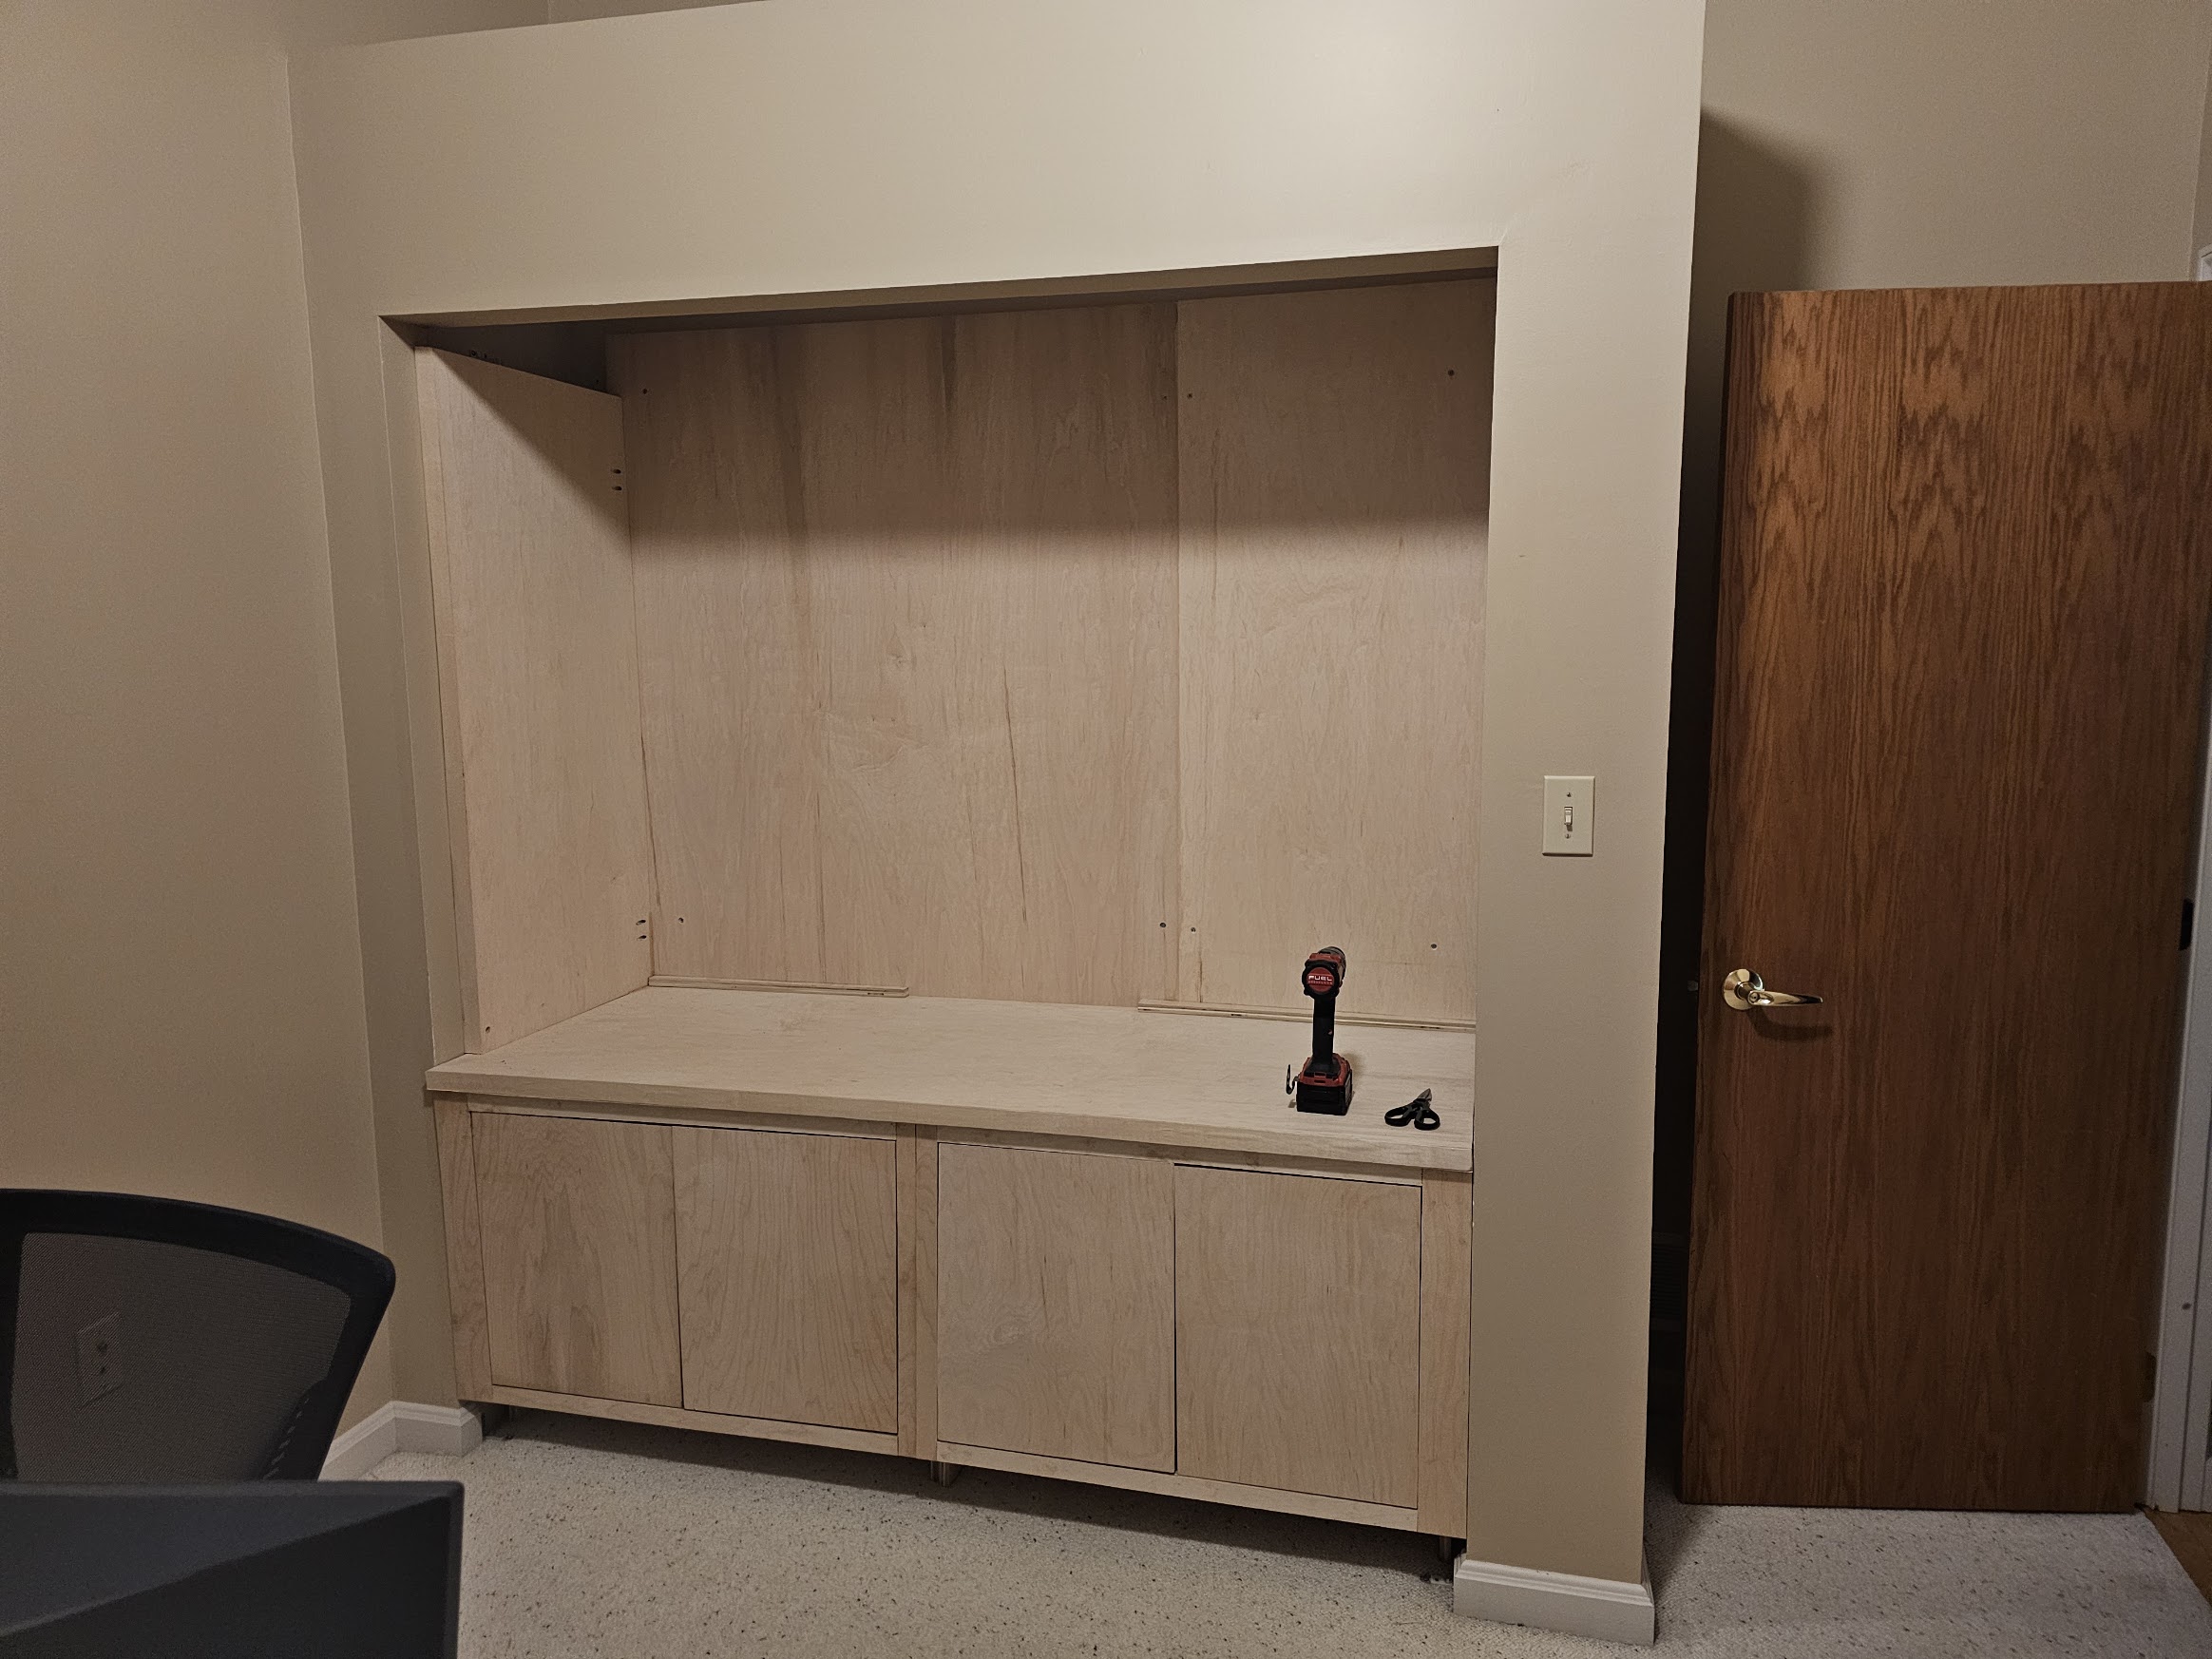 First back wall, seams running across open field in the middle of the opening, May 2026
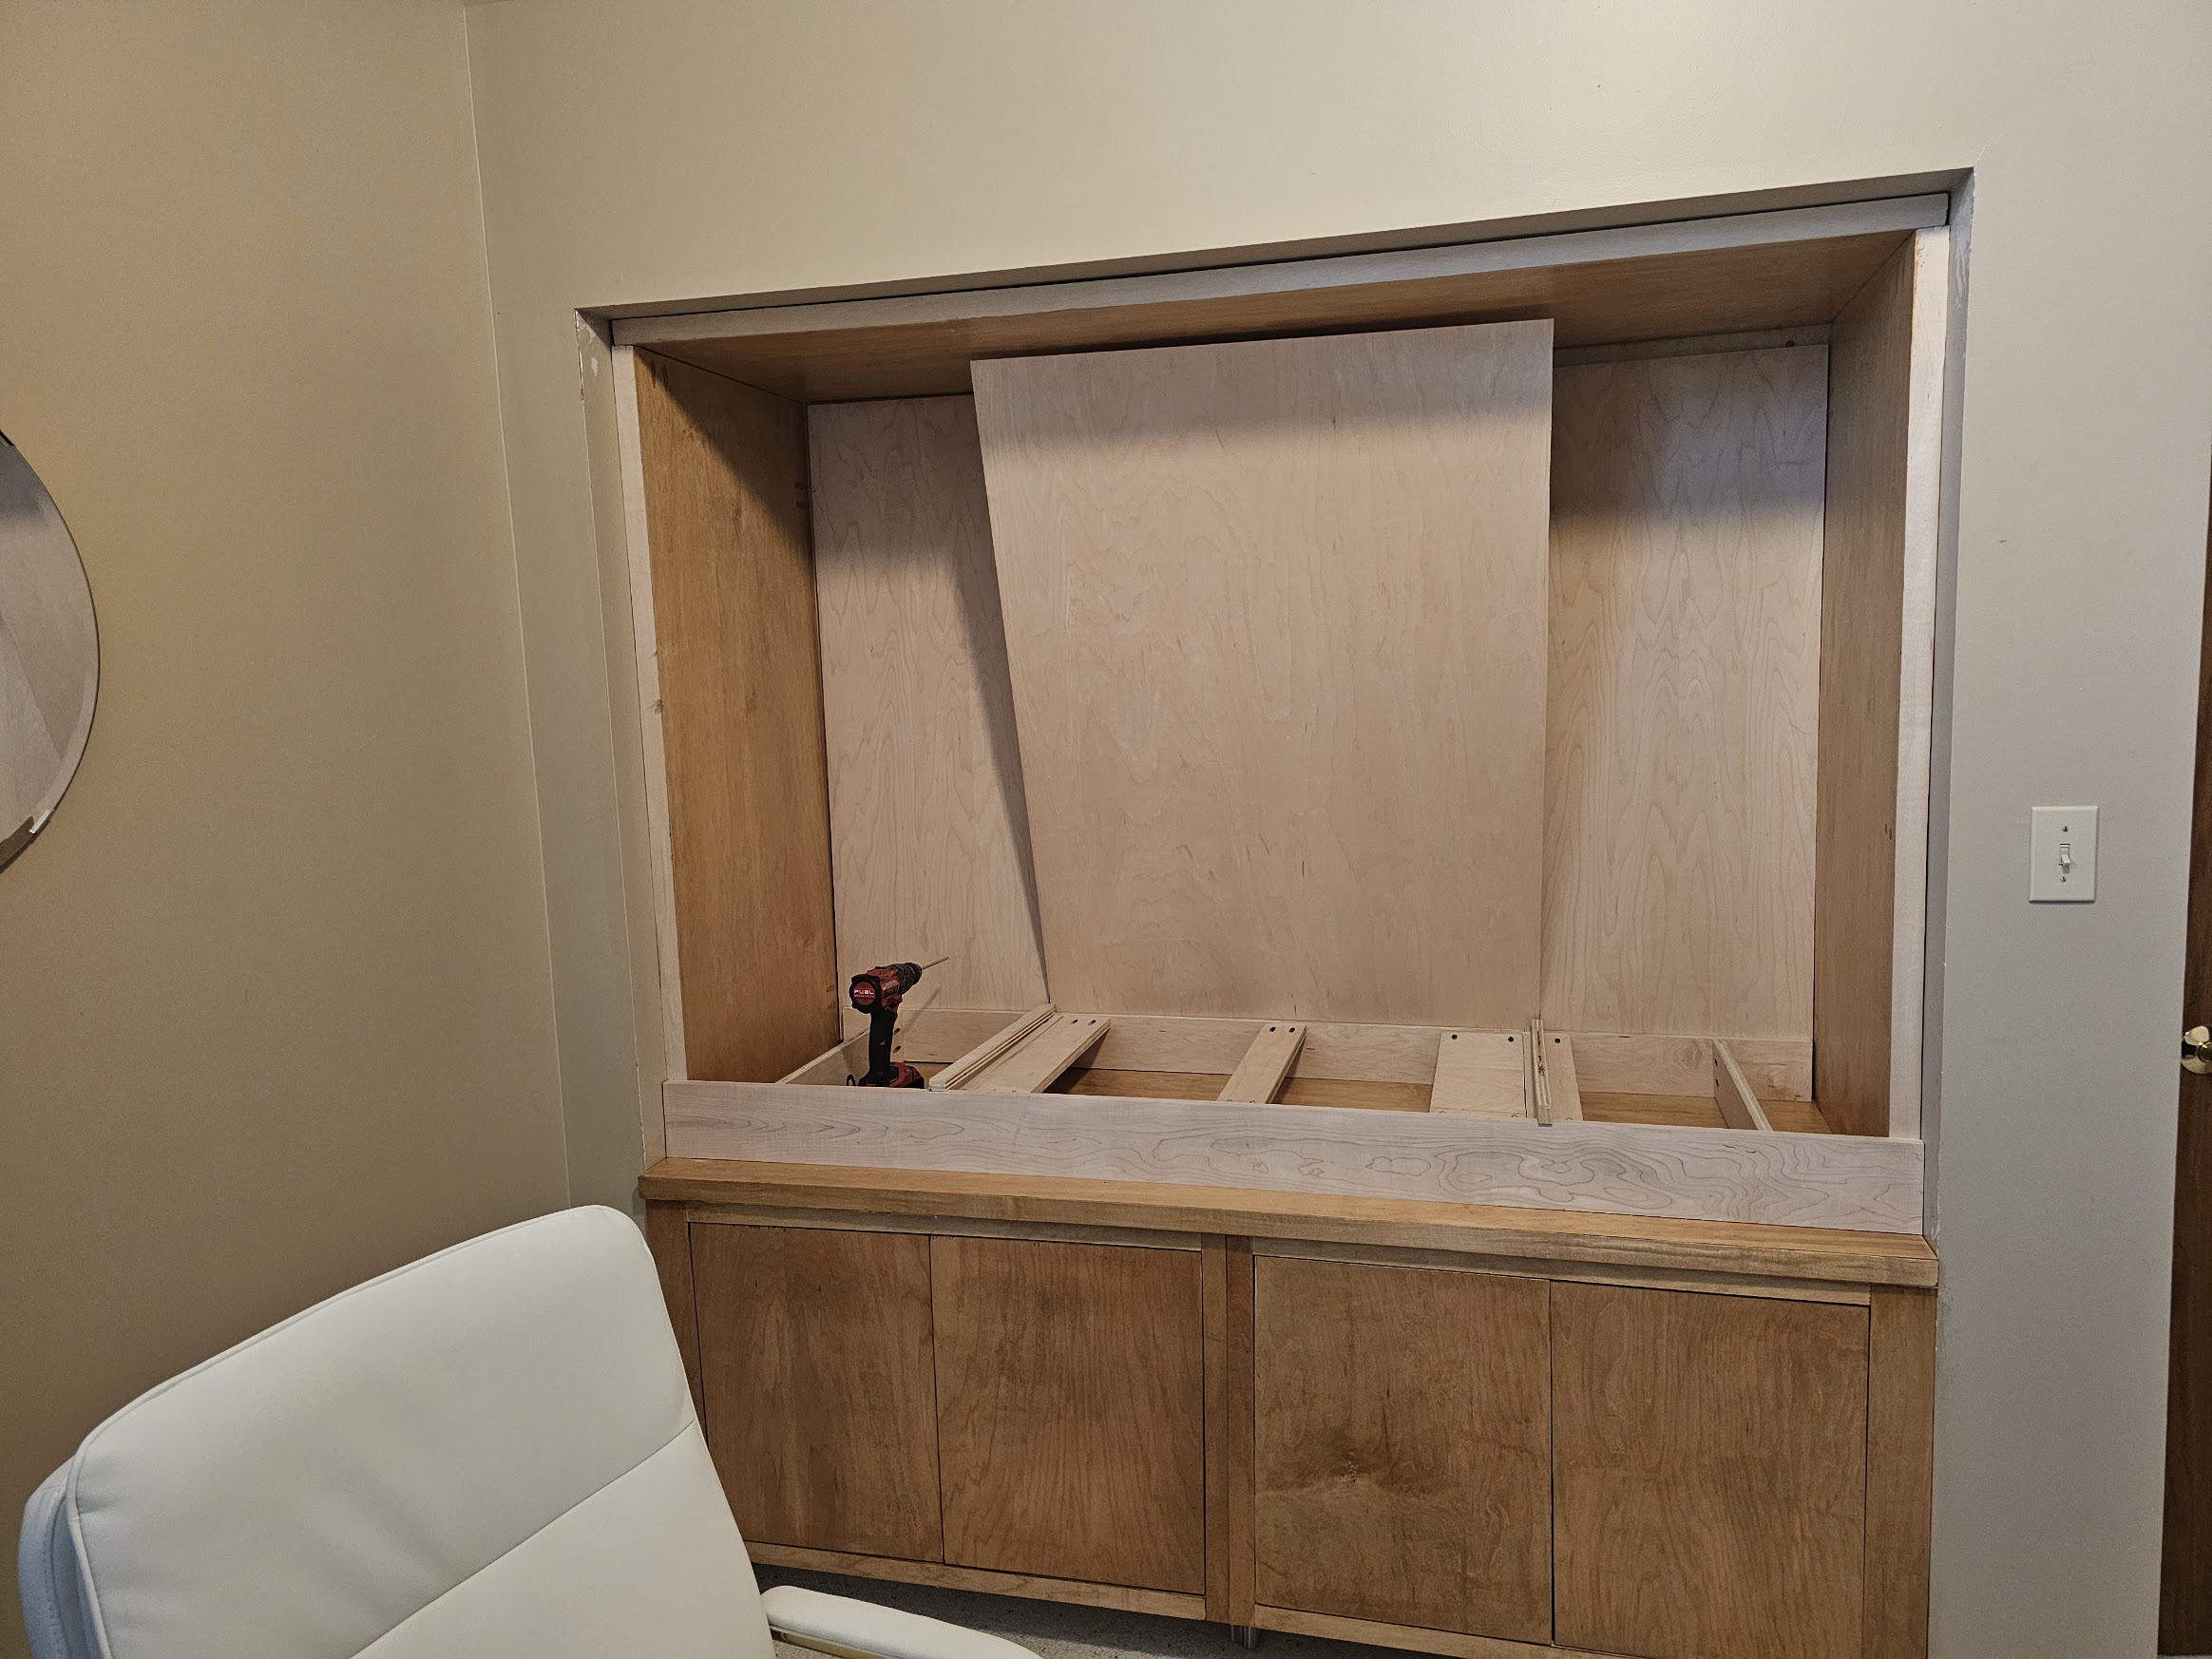 The redo underway: new raised ledge and floor framed in, replacement back panel staged, May 2026
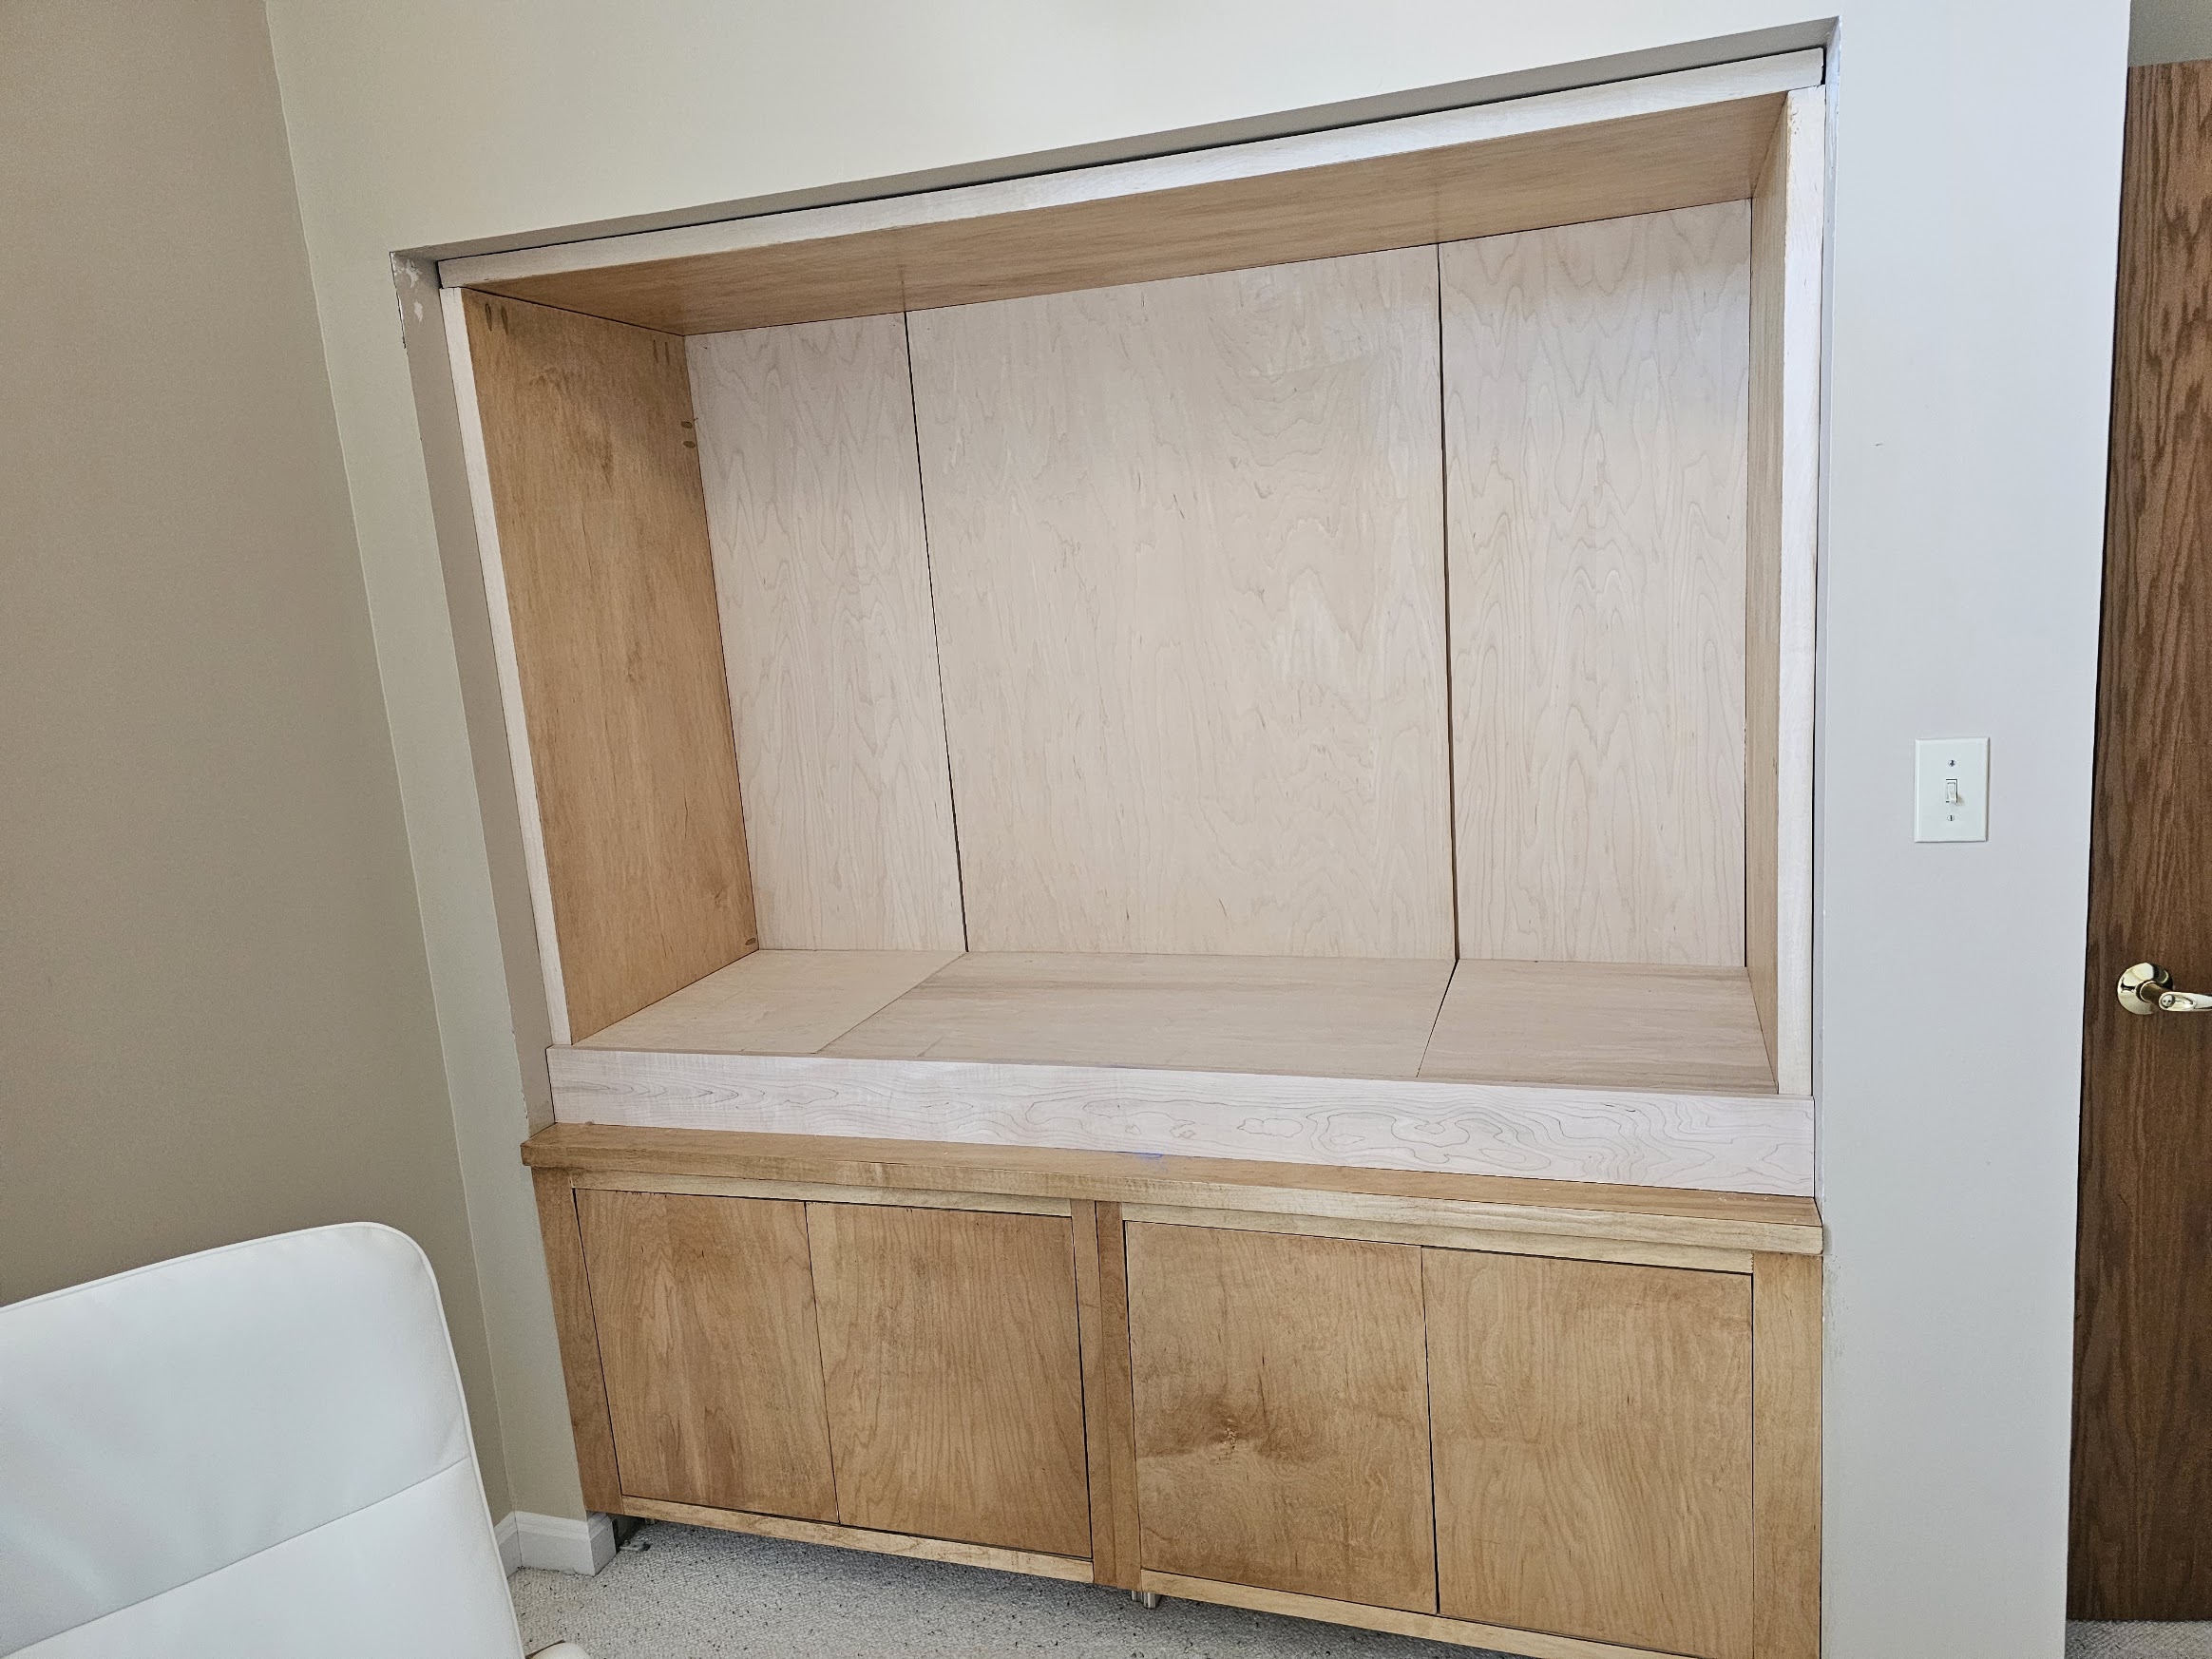 Second back wall in three panels, seams landing where the verticals will stand, June 2026
The Curve
The vertical dividers were originally going to run the full depth of the
opening, straight out to the front edge. Mocked up that way, each bay turned
into a deep, dark slot and the whole thing looked like storage instead of a
built-in. The fix was to cut a soft stocking profile into each vertical so it
sweeps back from the front edge and opens the bays up.
The rest of the build came together with ordinary shop tools — mitre saw,
table saw, a Kreg rip-cut guide for breaking down sheets, and pocket-hole and
hinge jigs for the joinery and the doors. The curve was the one cut none of
them could make. The stock was too thick to run safely with a handheld router,
so a friend with a CNC router cut the two profiles. It is the only part of the
build with outside hands on it.
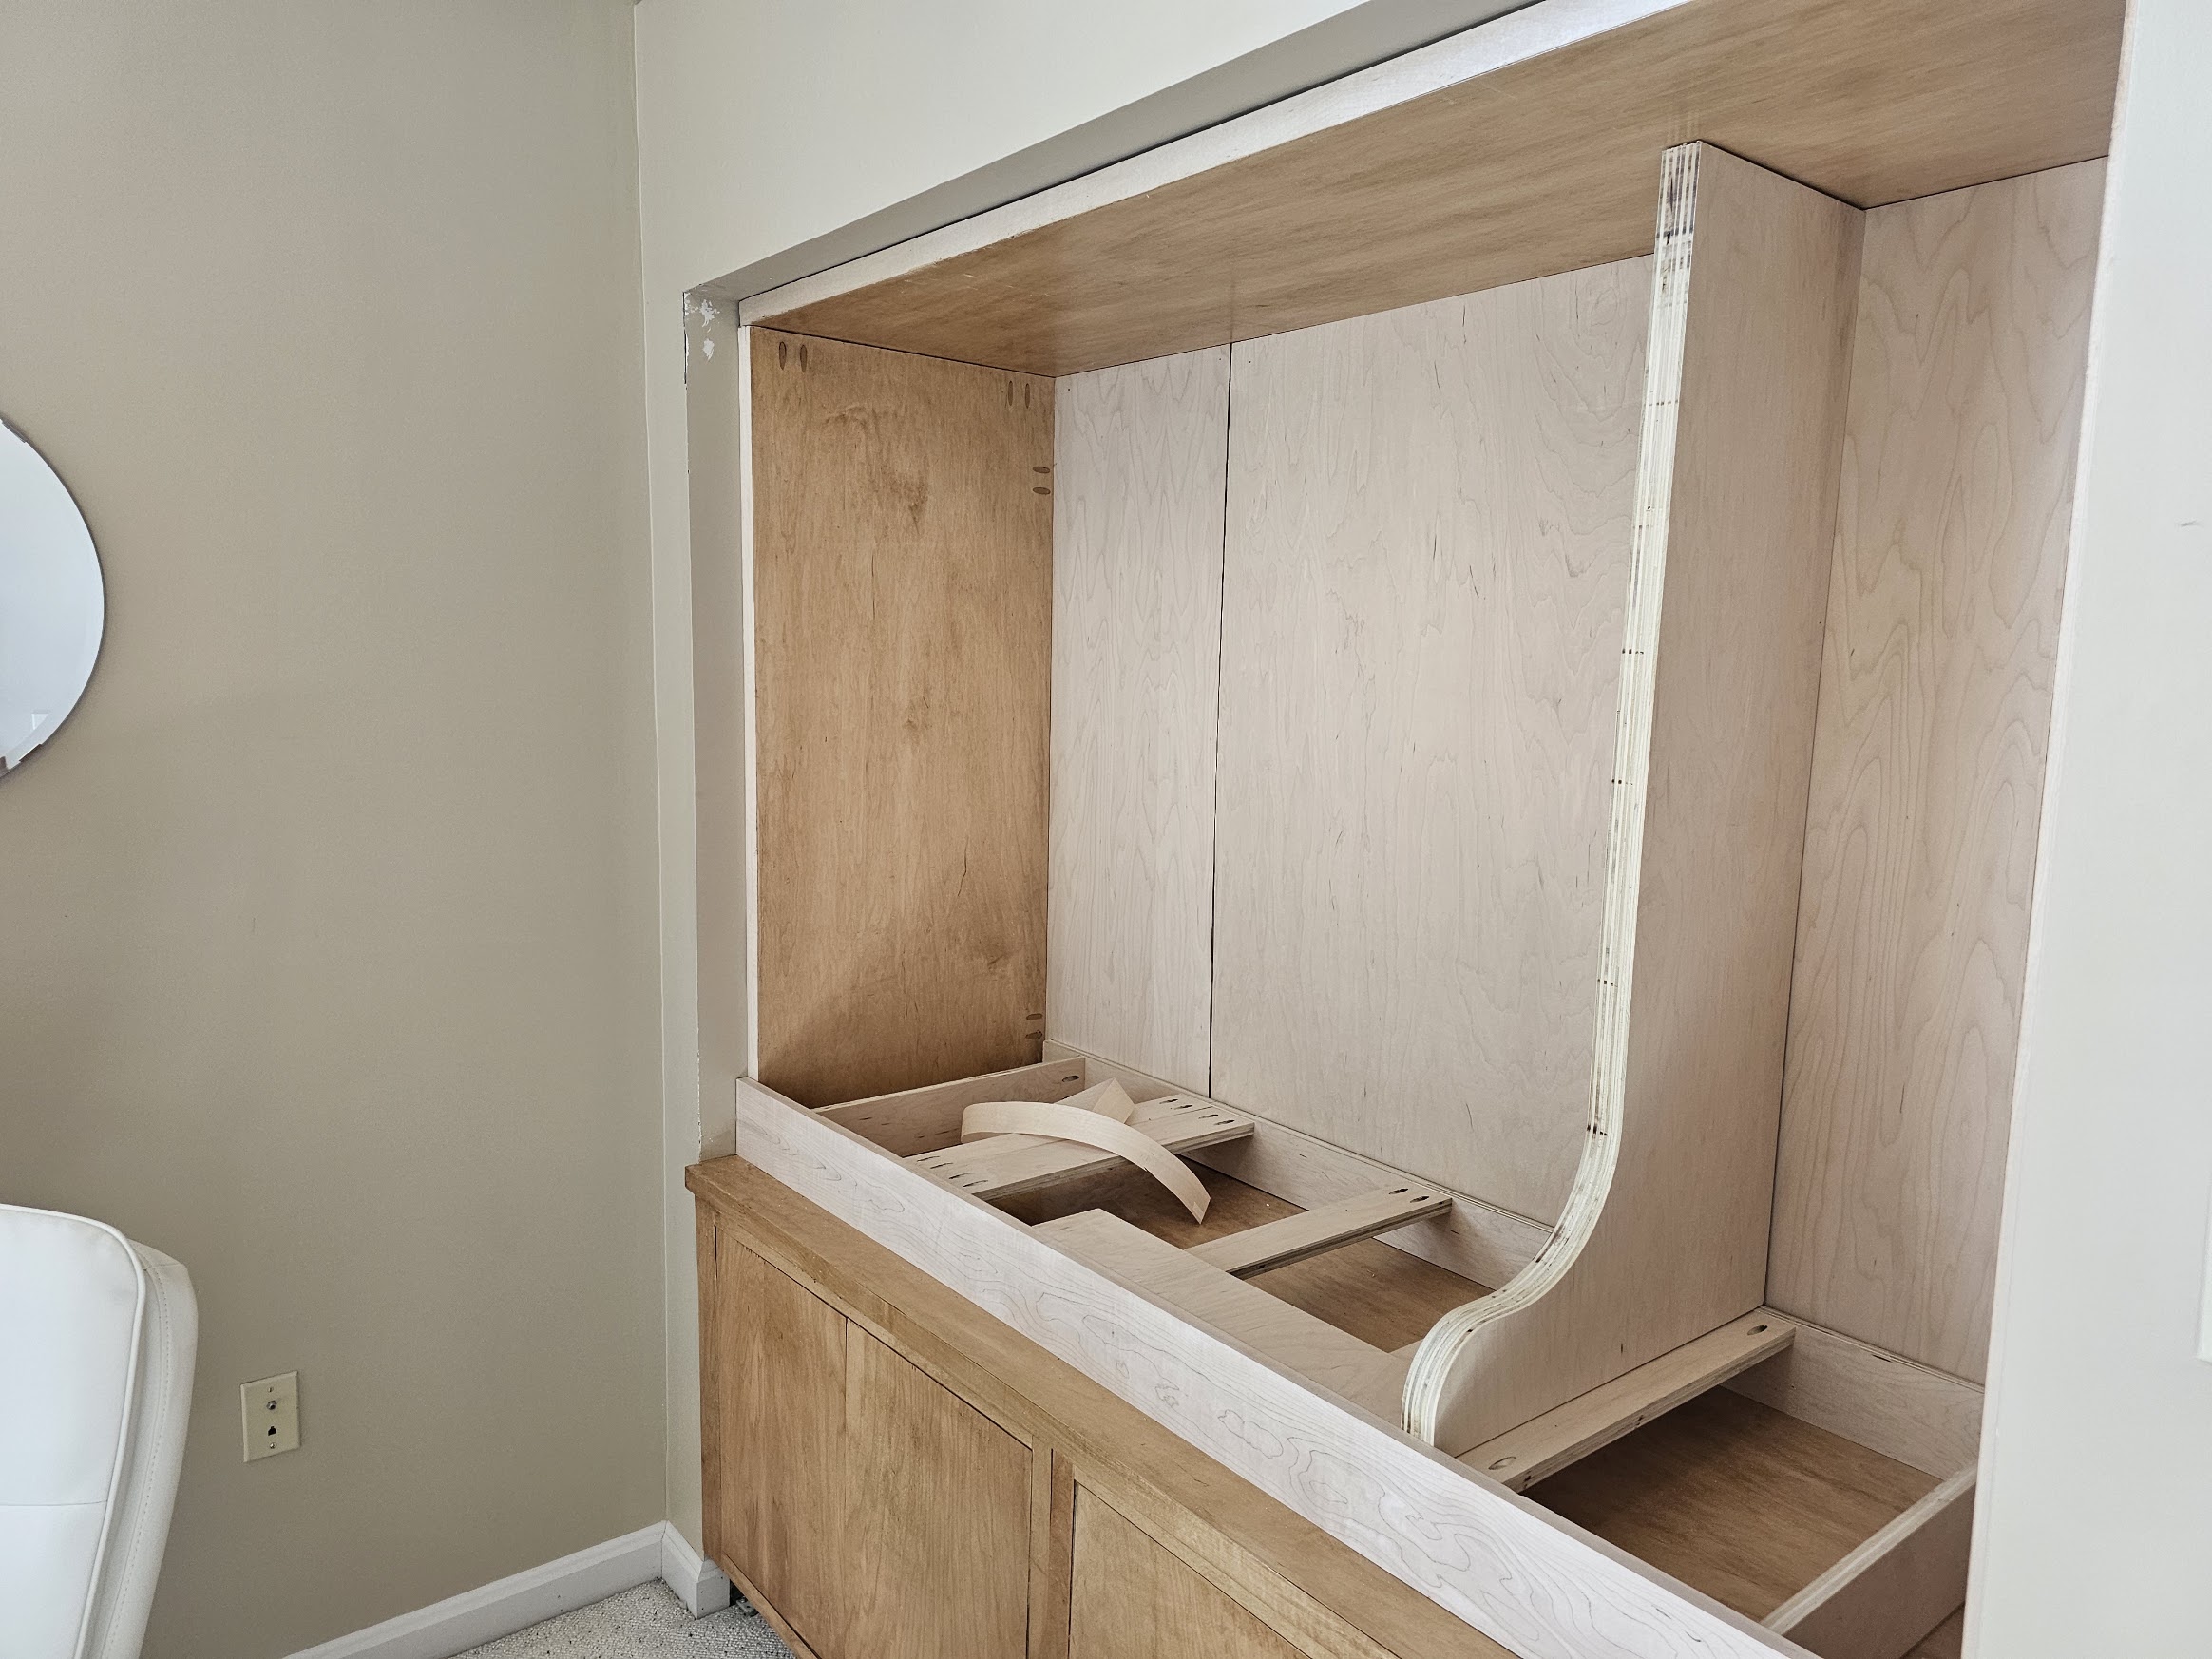 First curved vertical set in place, the stocking profile cut on the CNC, June 2026
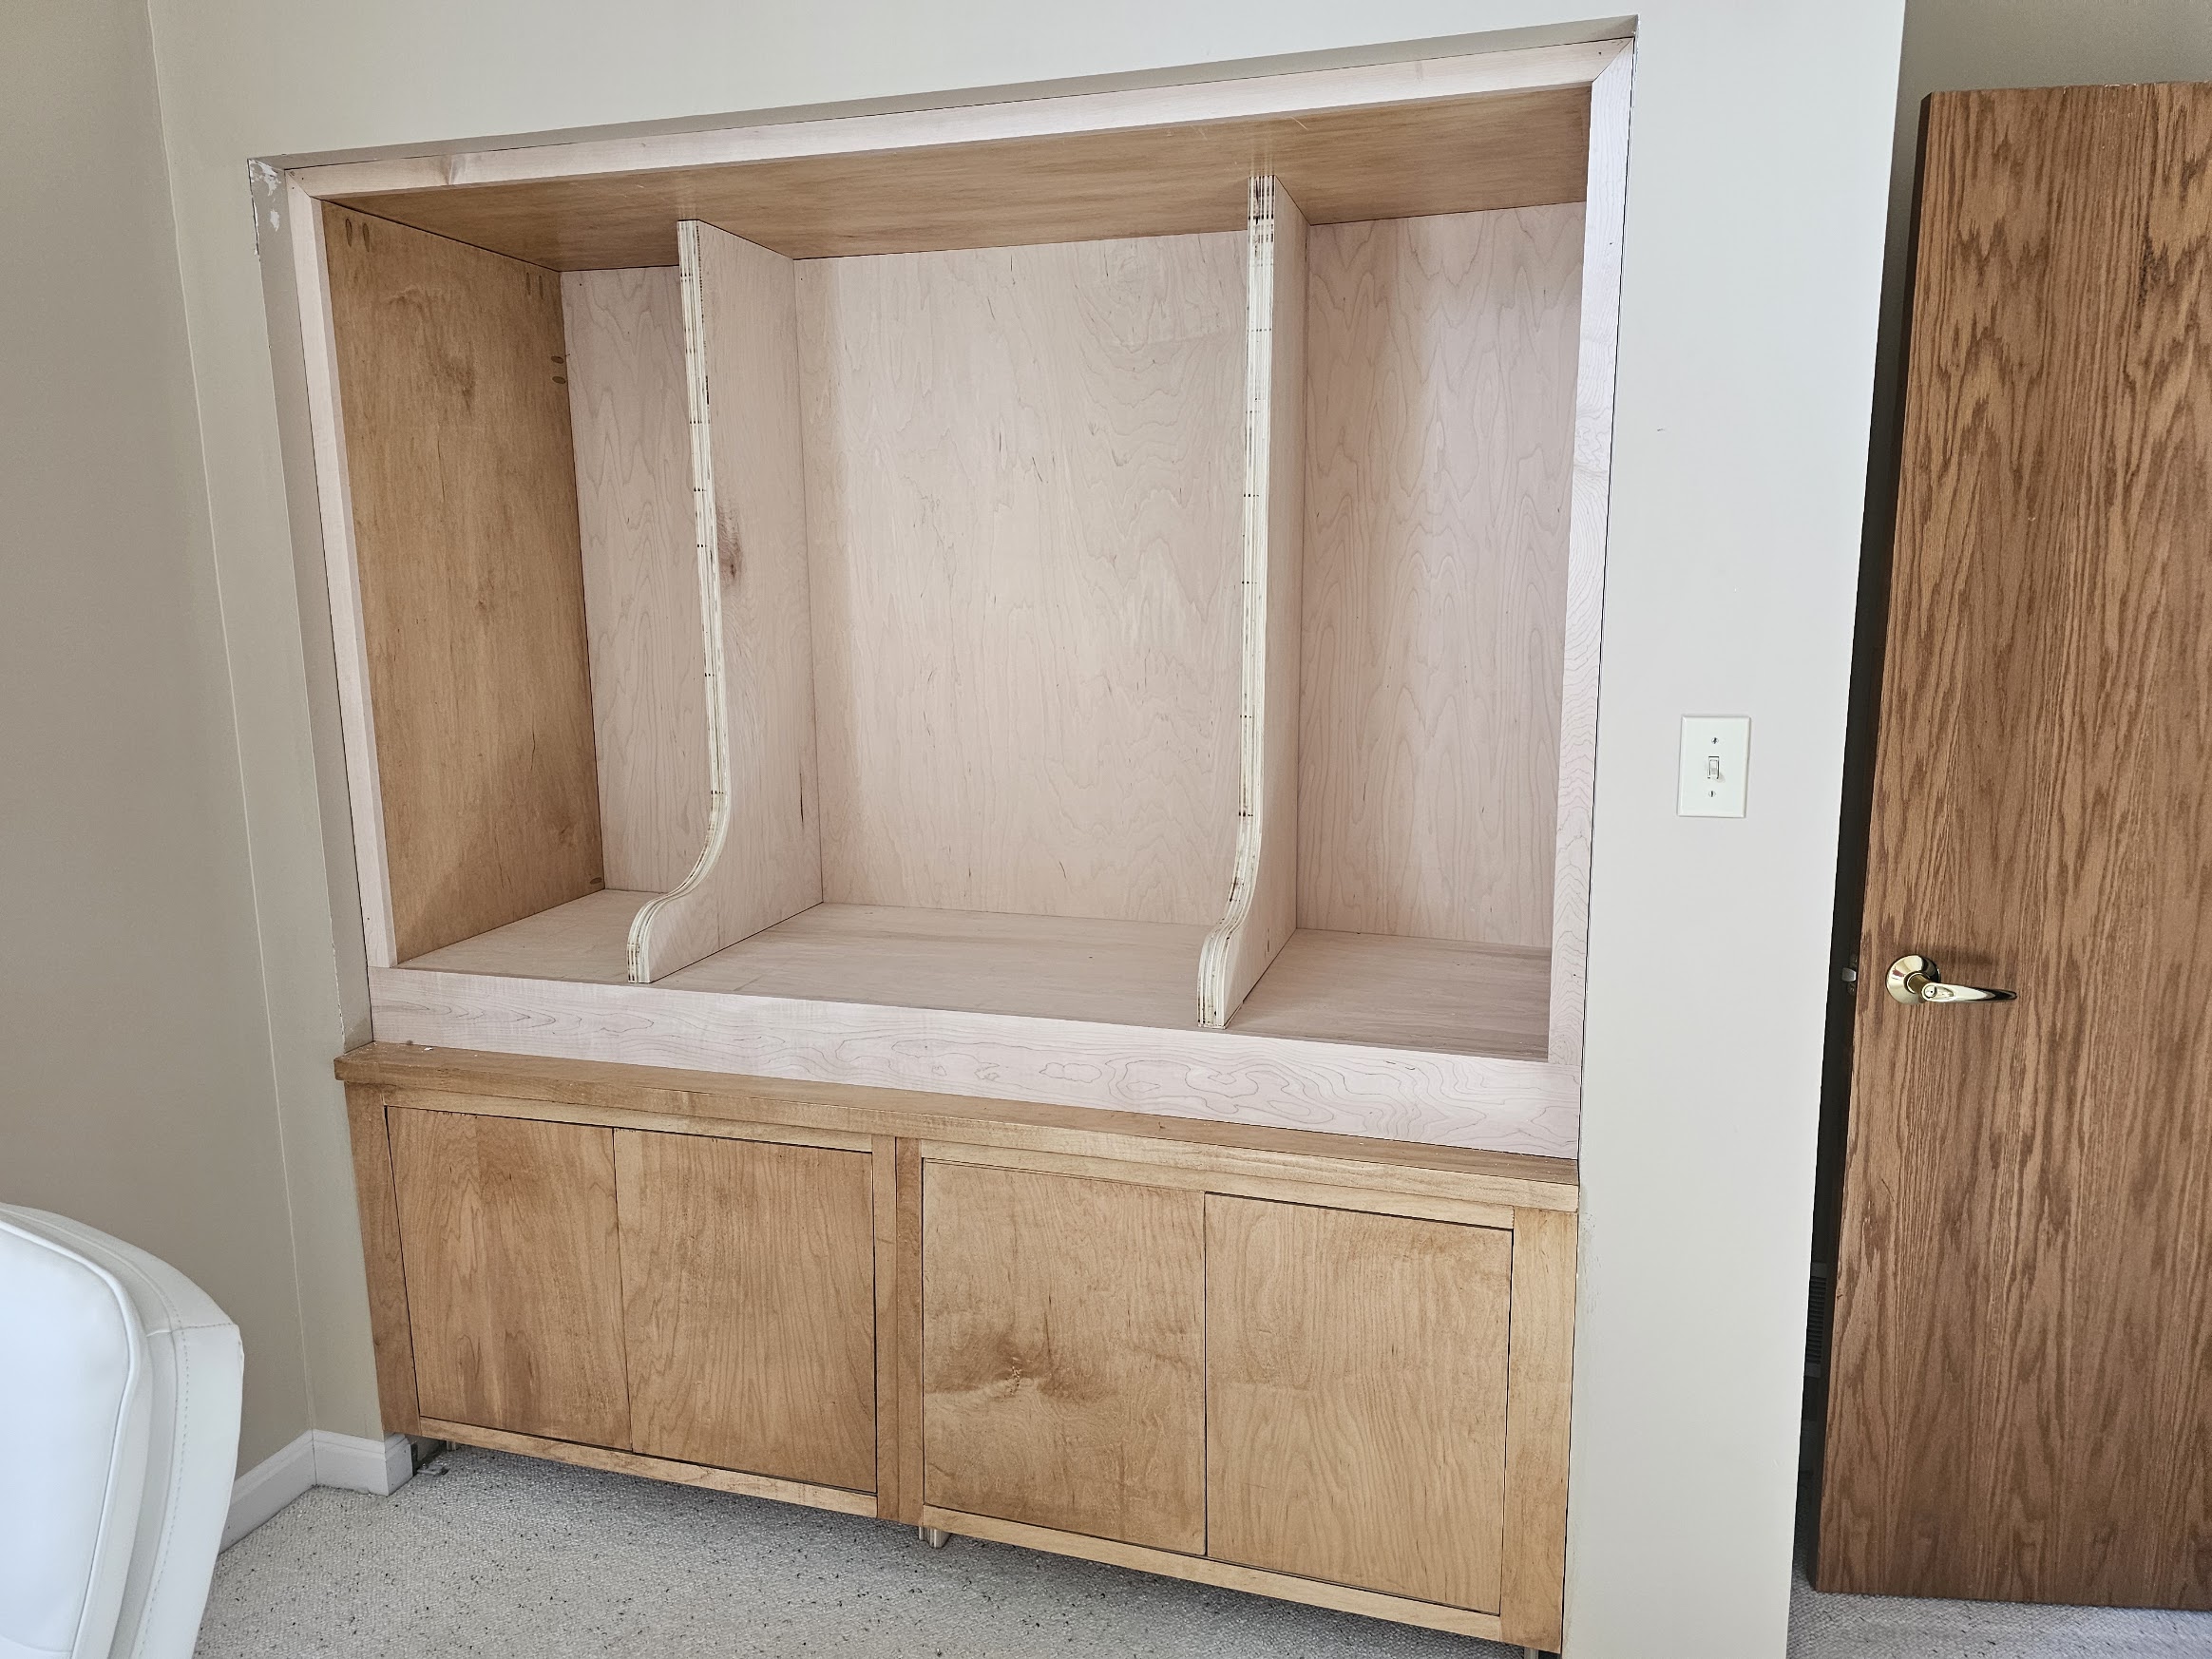 Both verticals in, curves mirrored, structure complete before finishing, June 2026
Lighting the Shelves
The shelves are lit from inside their own front edge. A channel is routed
down the length of the shelf edge, a 24V LED strip is set into the channel,
and a silicone diffuser cover presses in over the top. No visible strip, no
row of dots, no aluminum extrusion stuck on afterward — just a continuous
line of light sitting flush in the wood. Color and brightness run off a
remote.
The piece in these photos never made it into the build. It was cut for a run
across the bottom, and once it was in place it looked wrong and got pulled.
The method is what survived, and it is the same method in every lit shelf
on the wall.
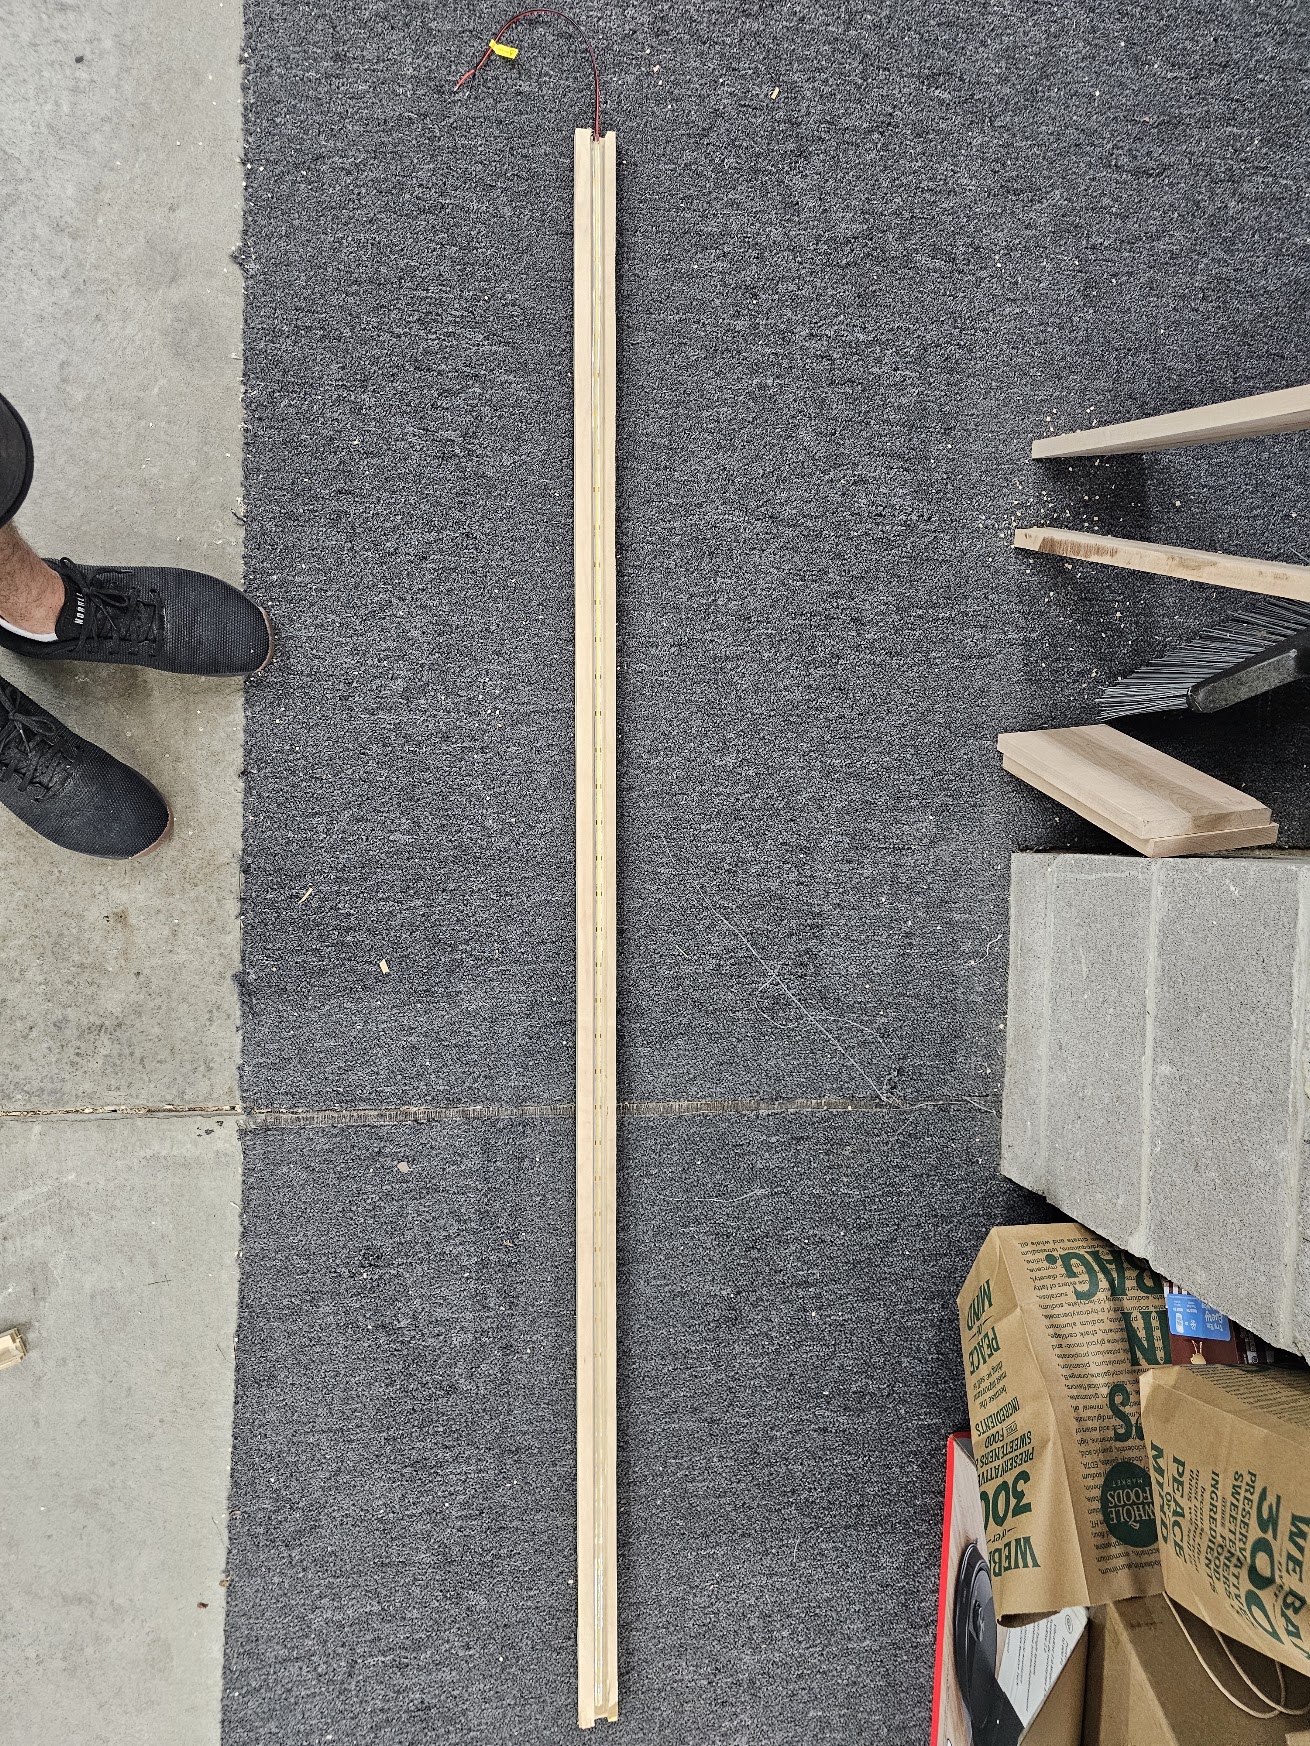 Channel routed into the shelf edge with the LED strip seated inside, August 2026
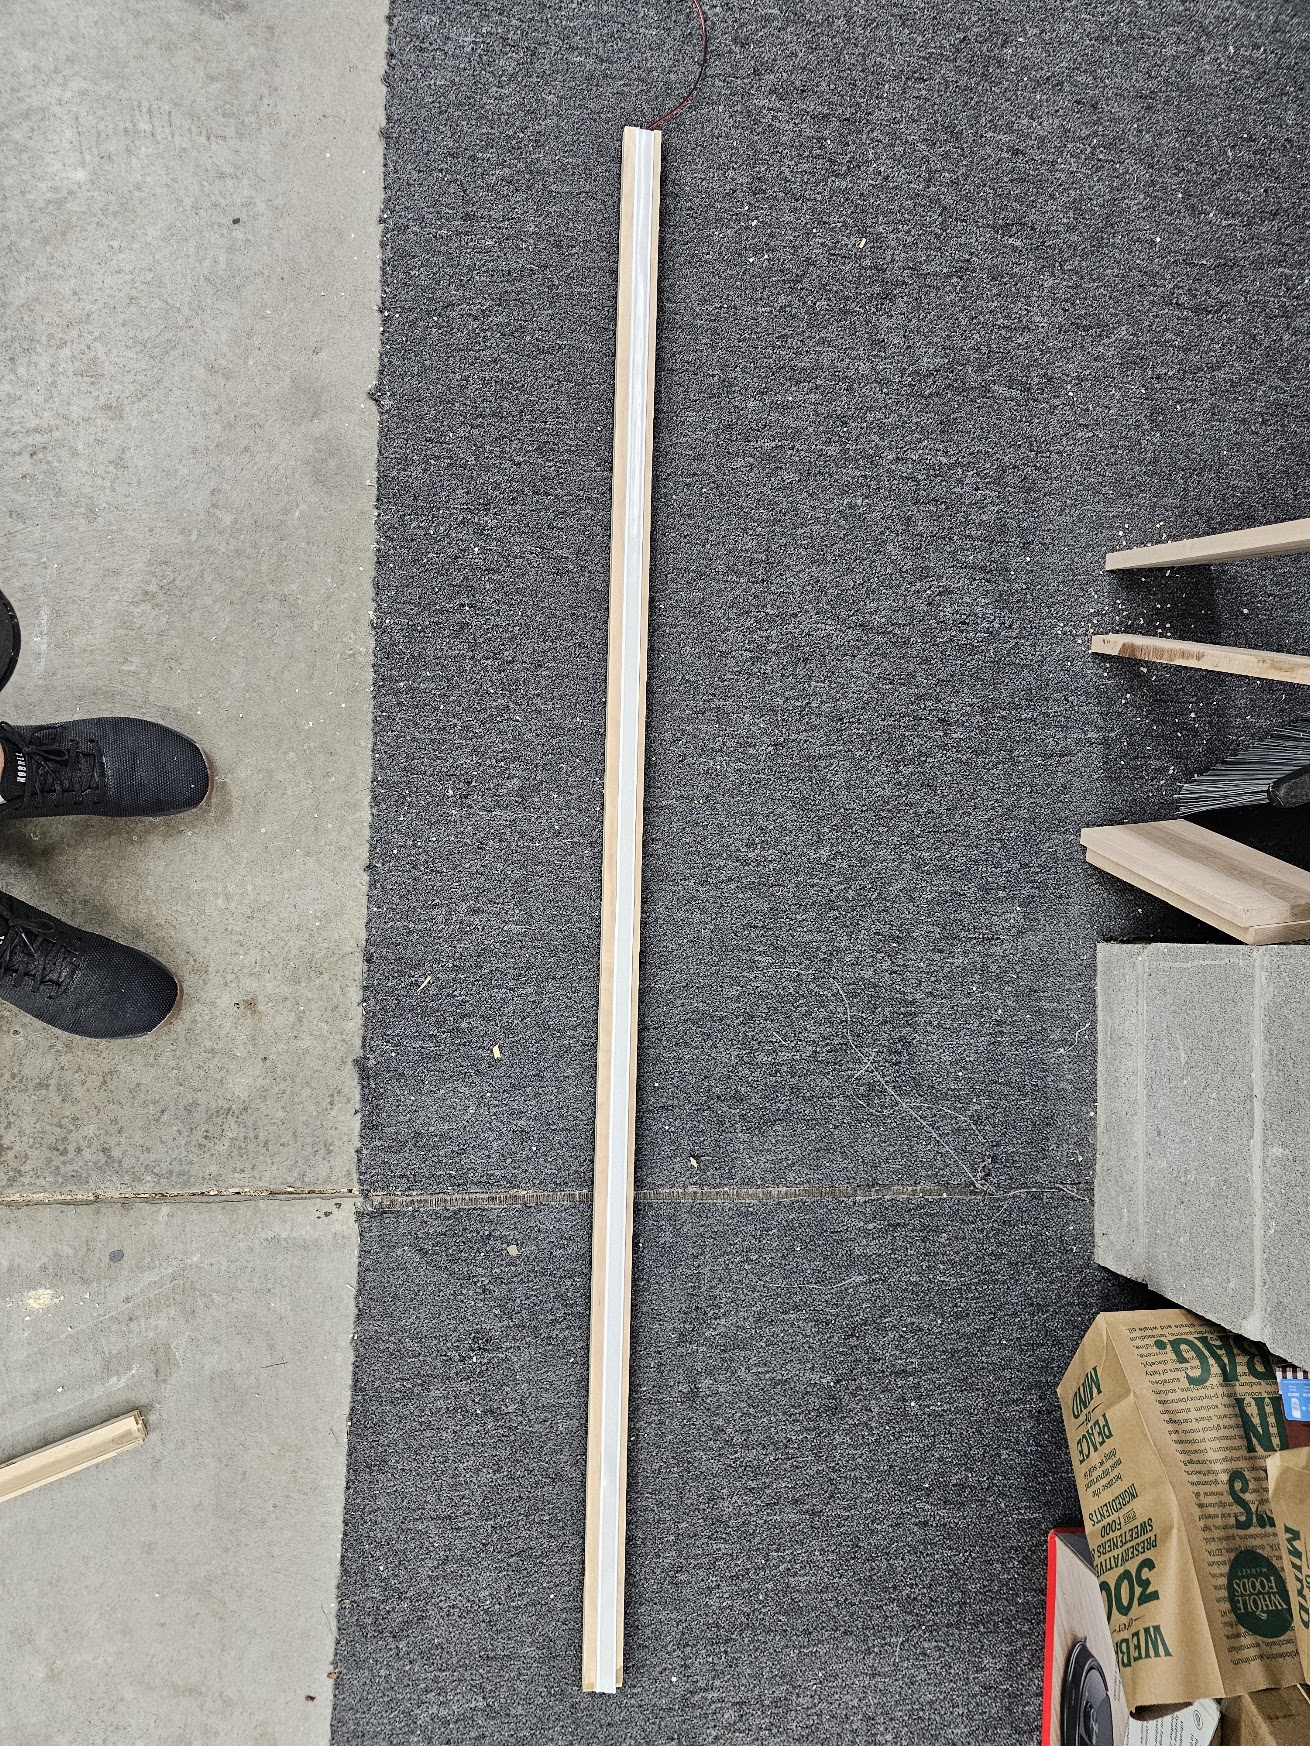 Silicone diffuser cover pressed in over the strip, flush with the wood
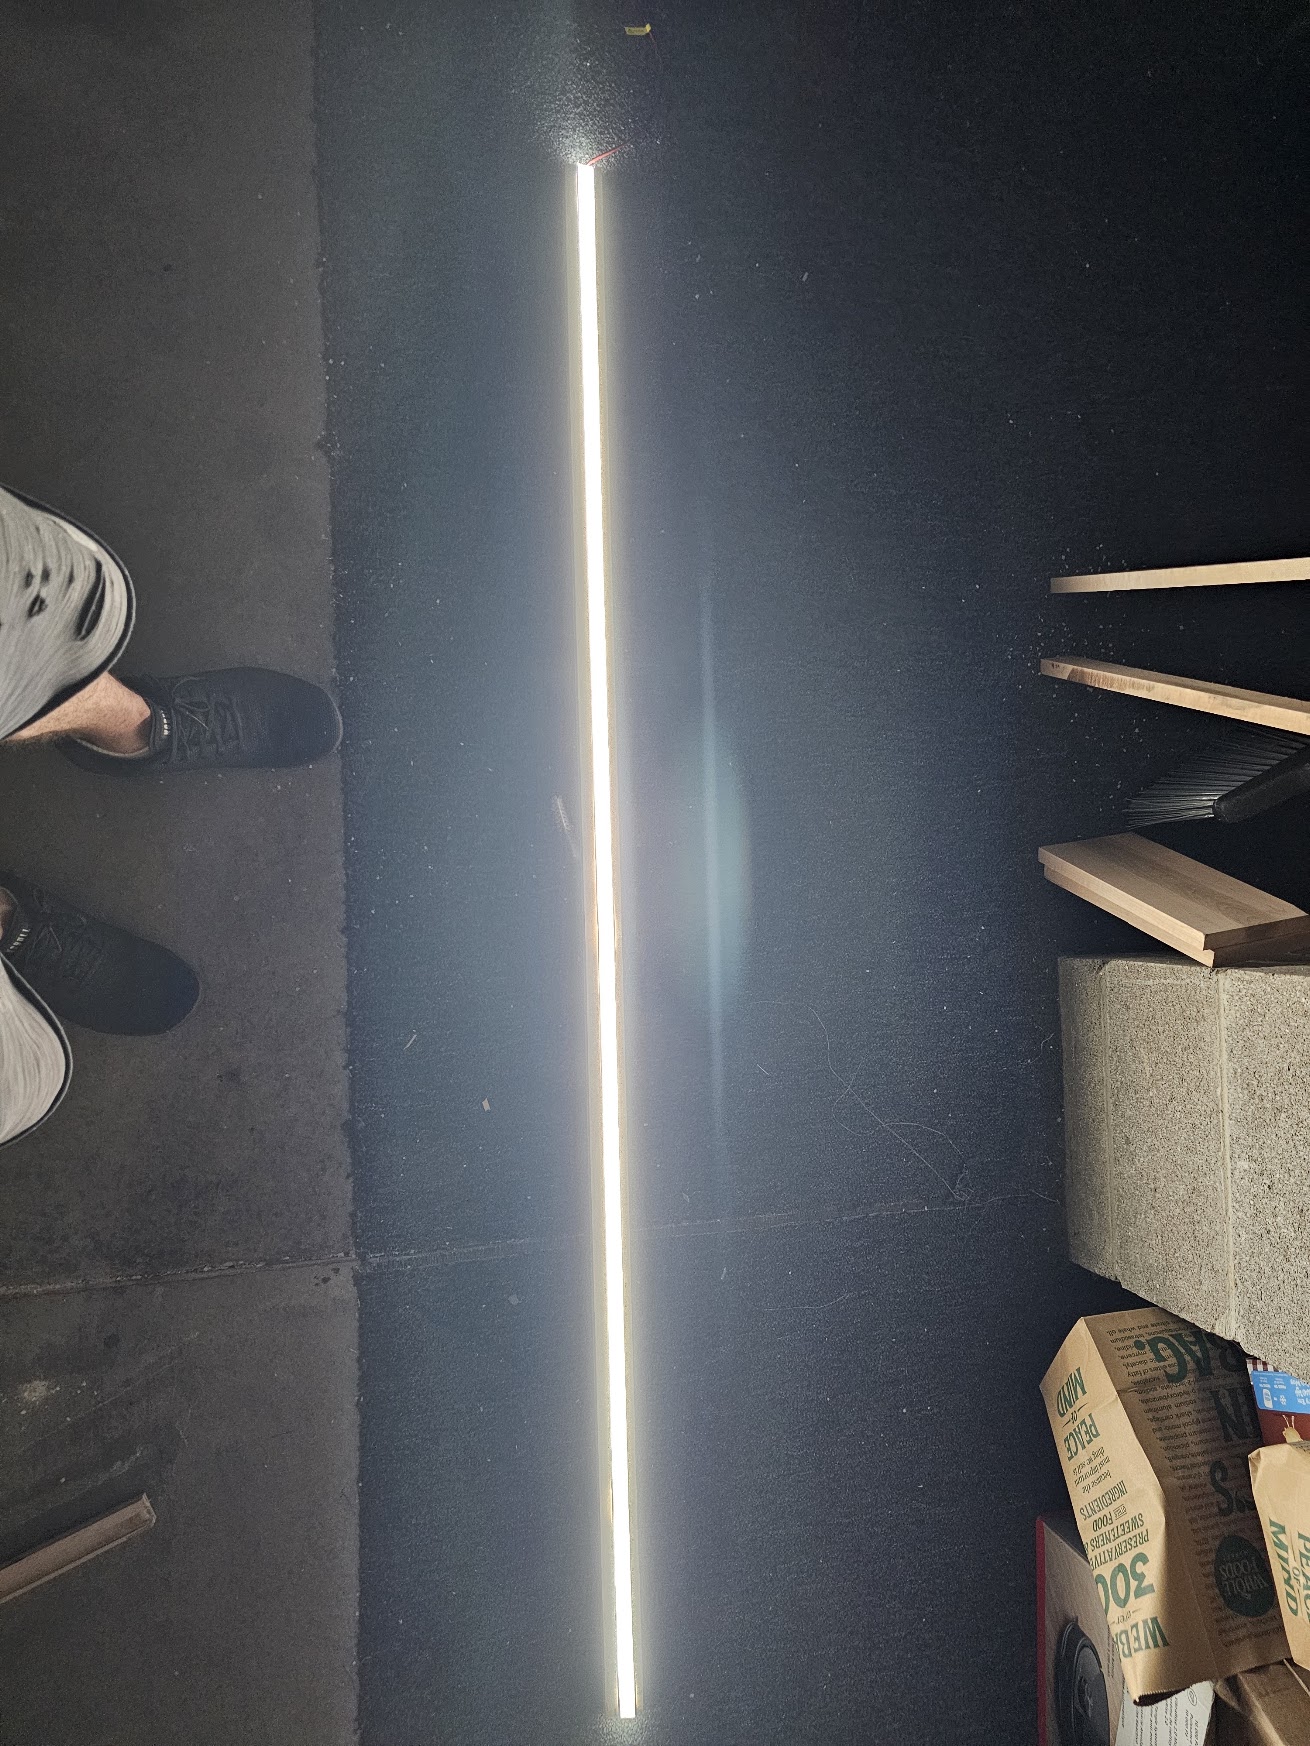 Lit in the dark: one continuous line, no dotting, no visible hardware
Finished
Stained, lit, and loaded. The bays hold what bays hold. The center is deliberately open at desk height with a single framed piece behind it, because the whole wall was always going to be a video-call backdrop and that is the part the camera sees. It works better than expected — people on calls ask whether it is a virtual background.
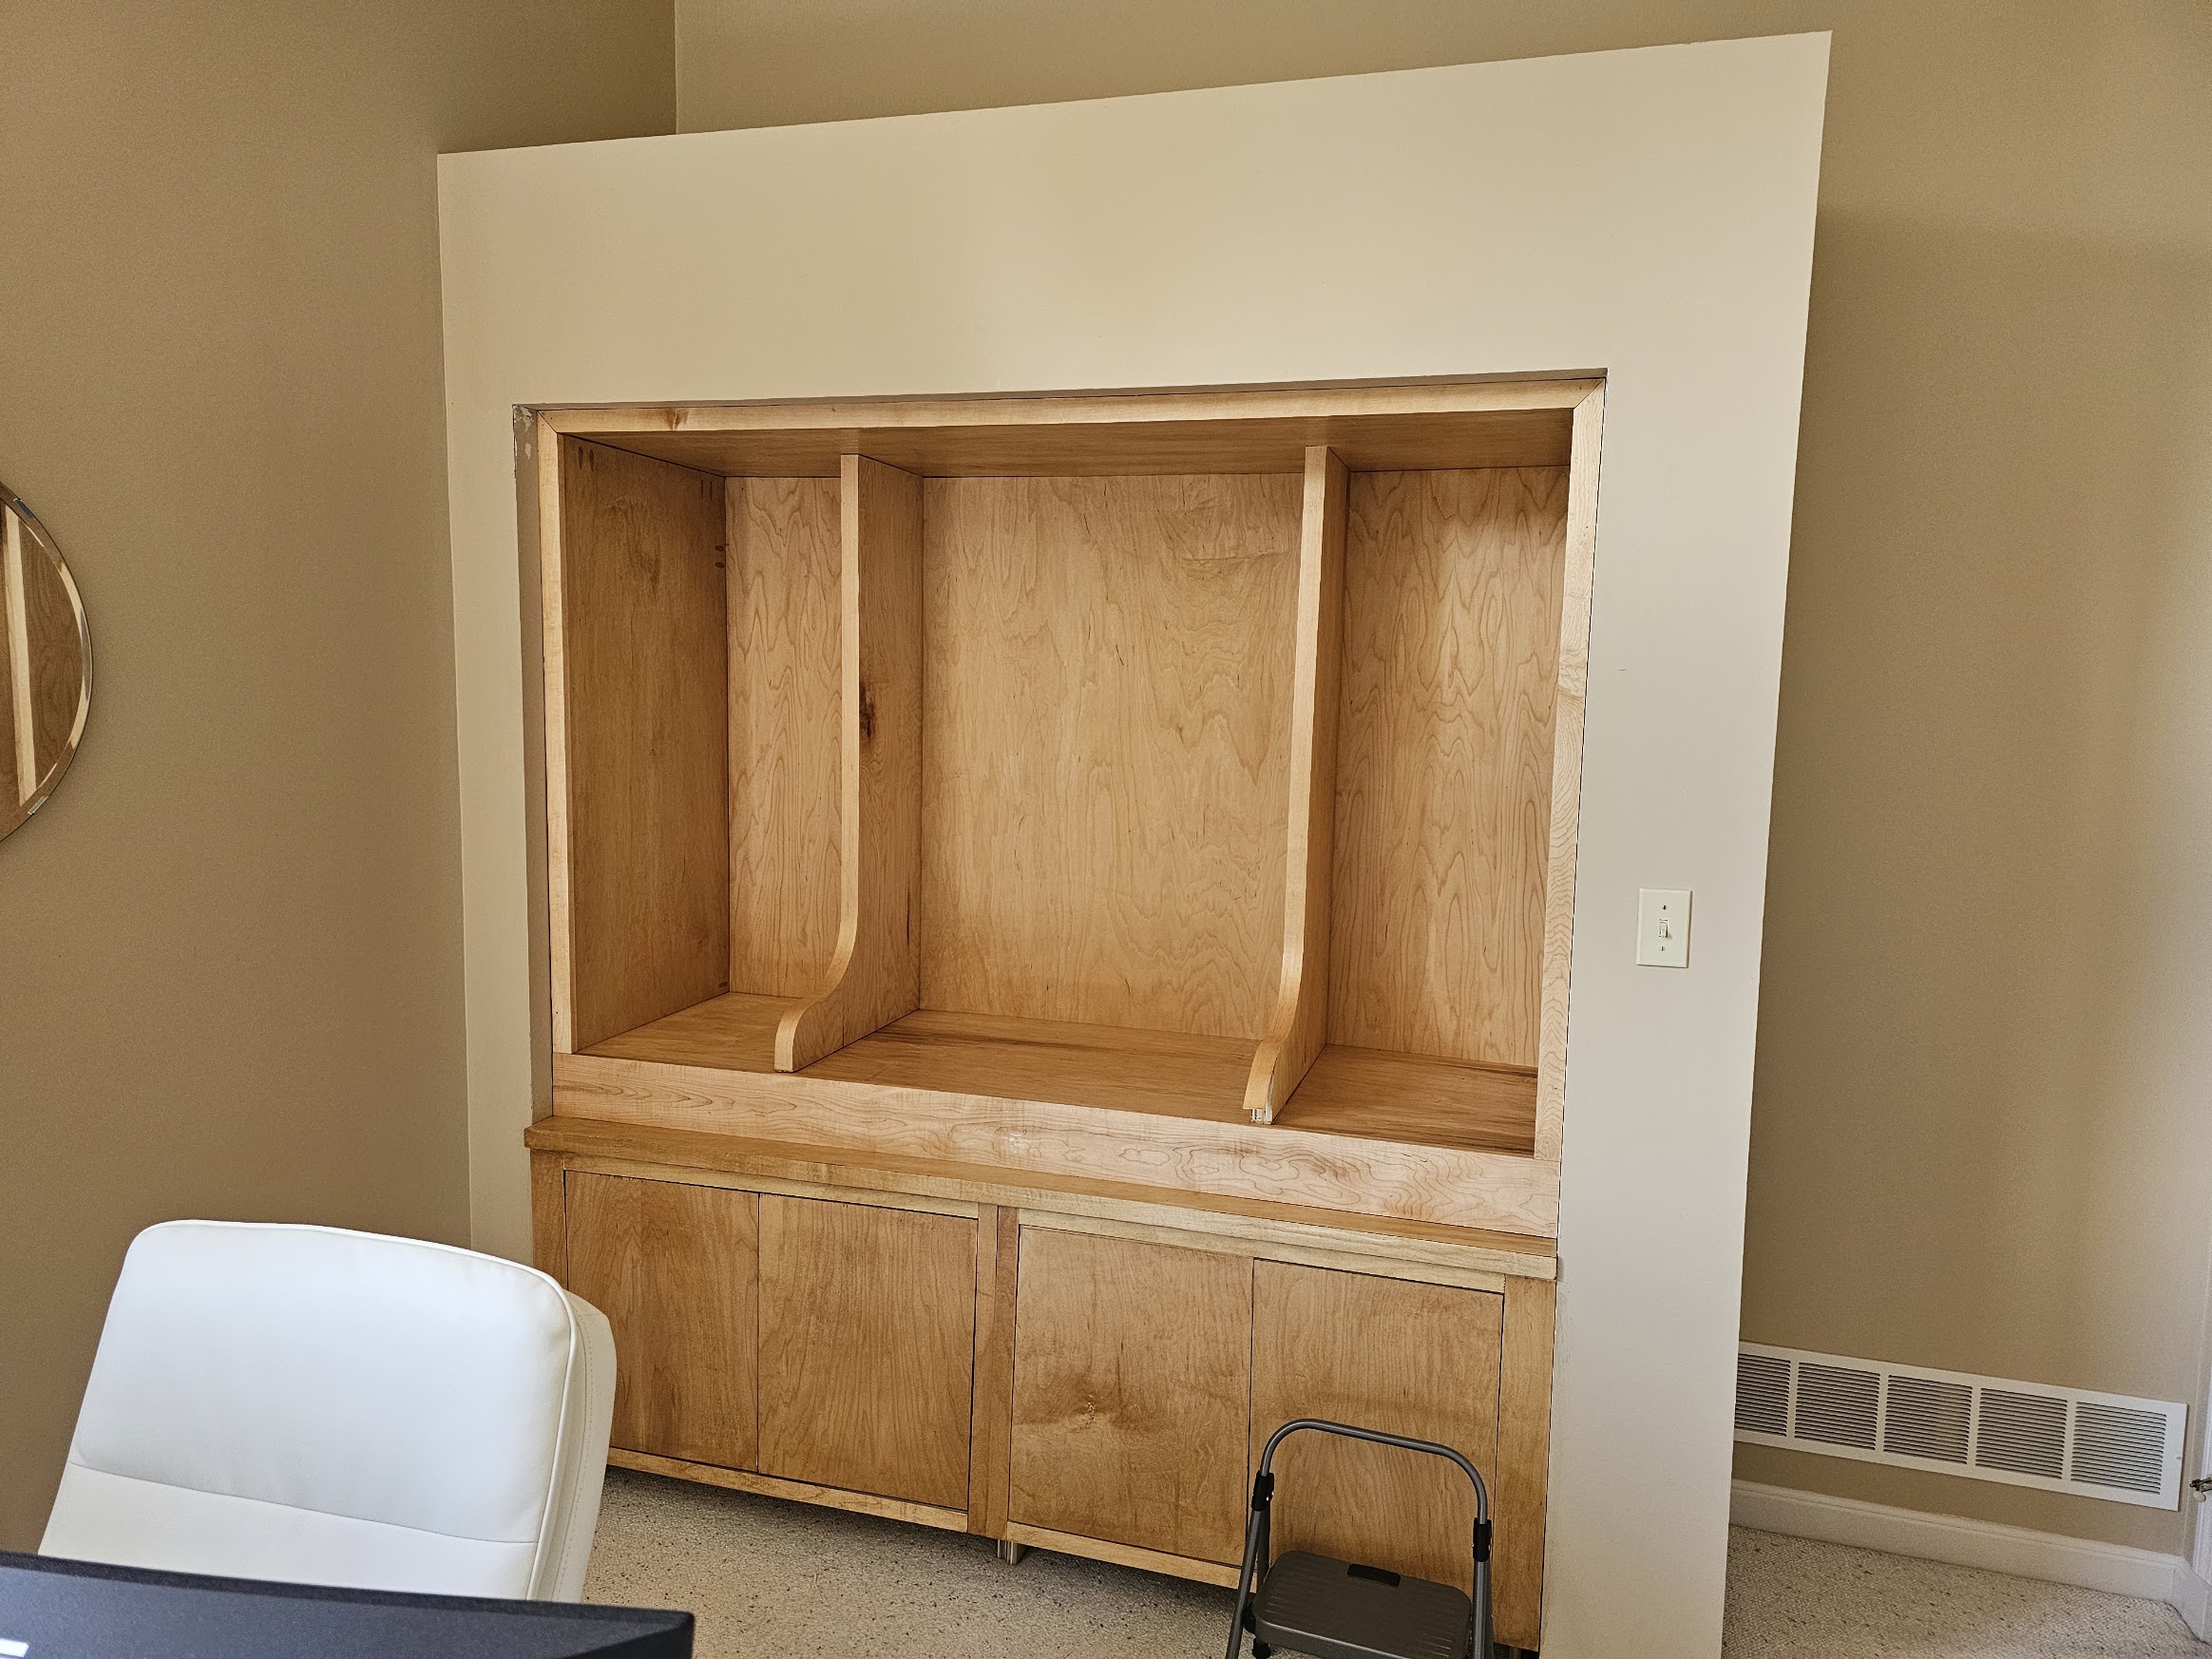 Stained and empty: the woodwork with nothing on it, June 2026
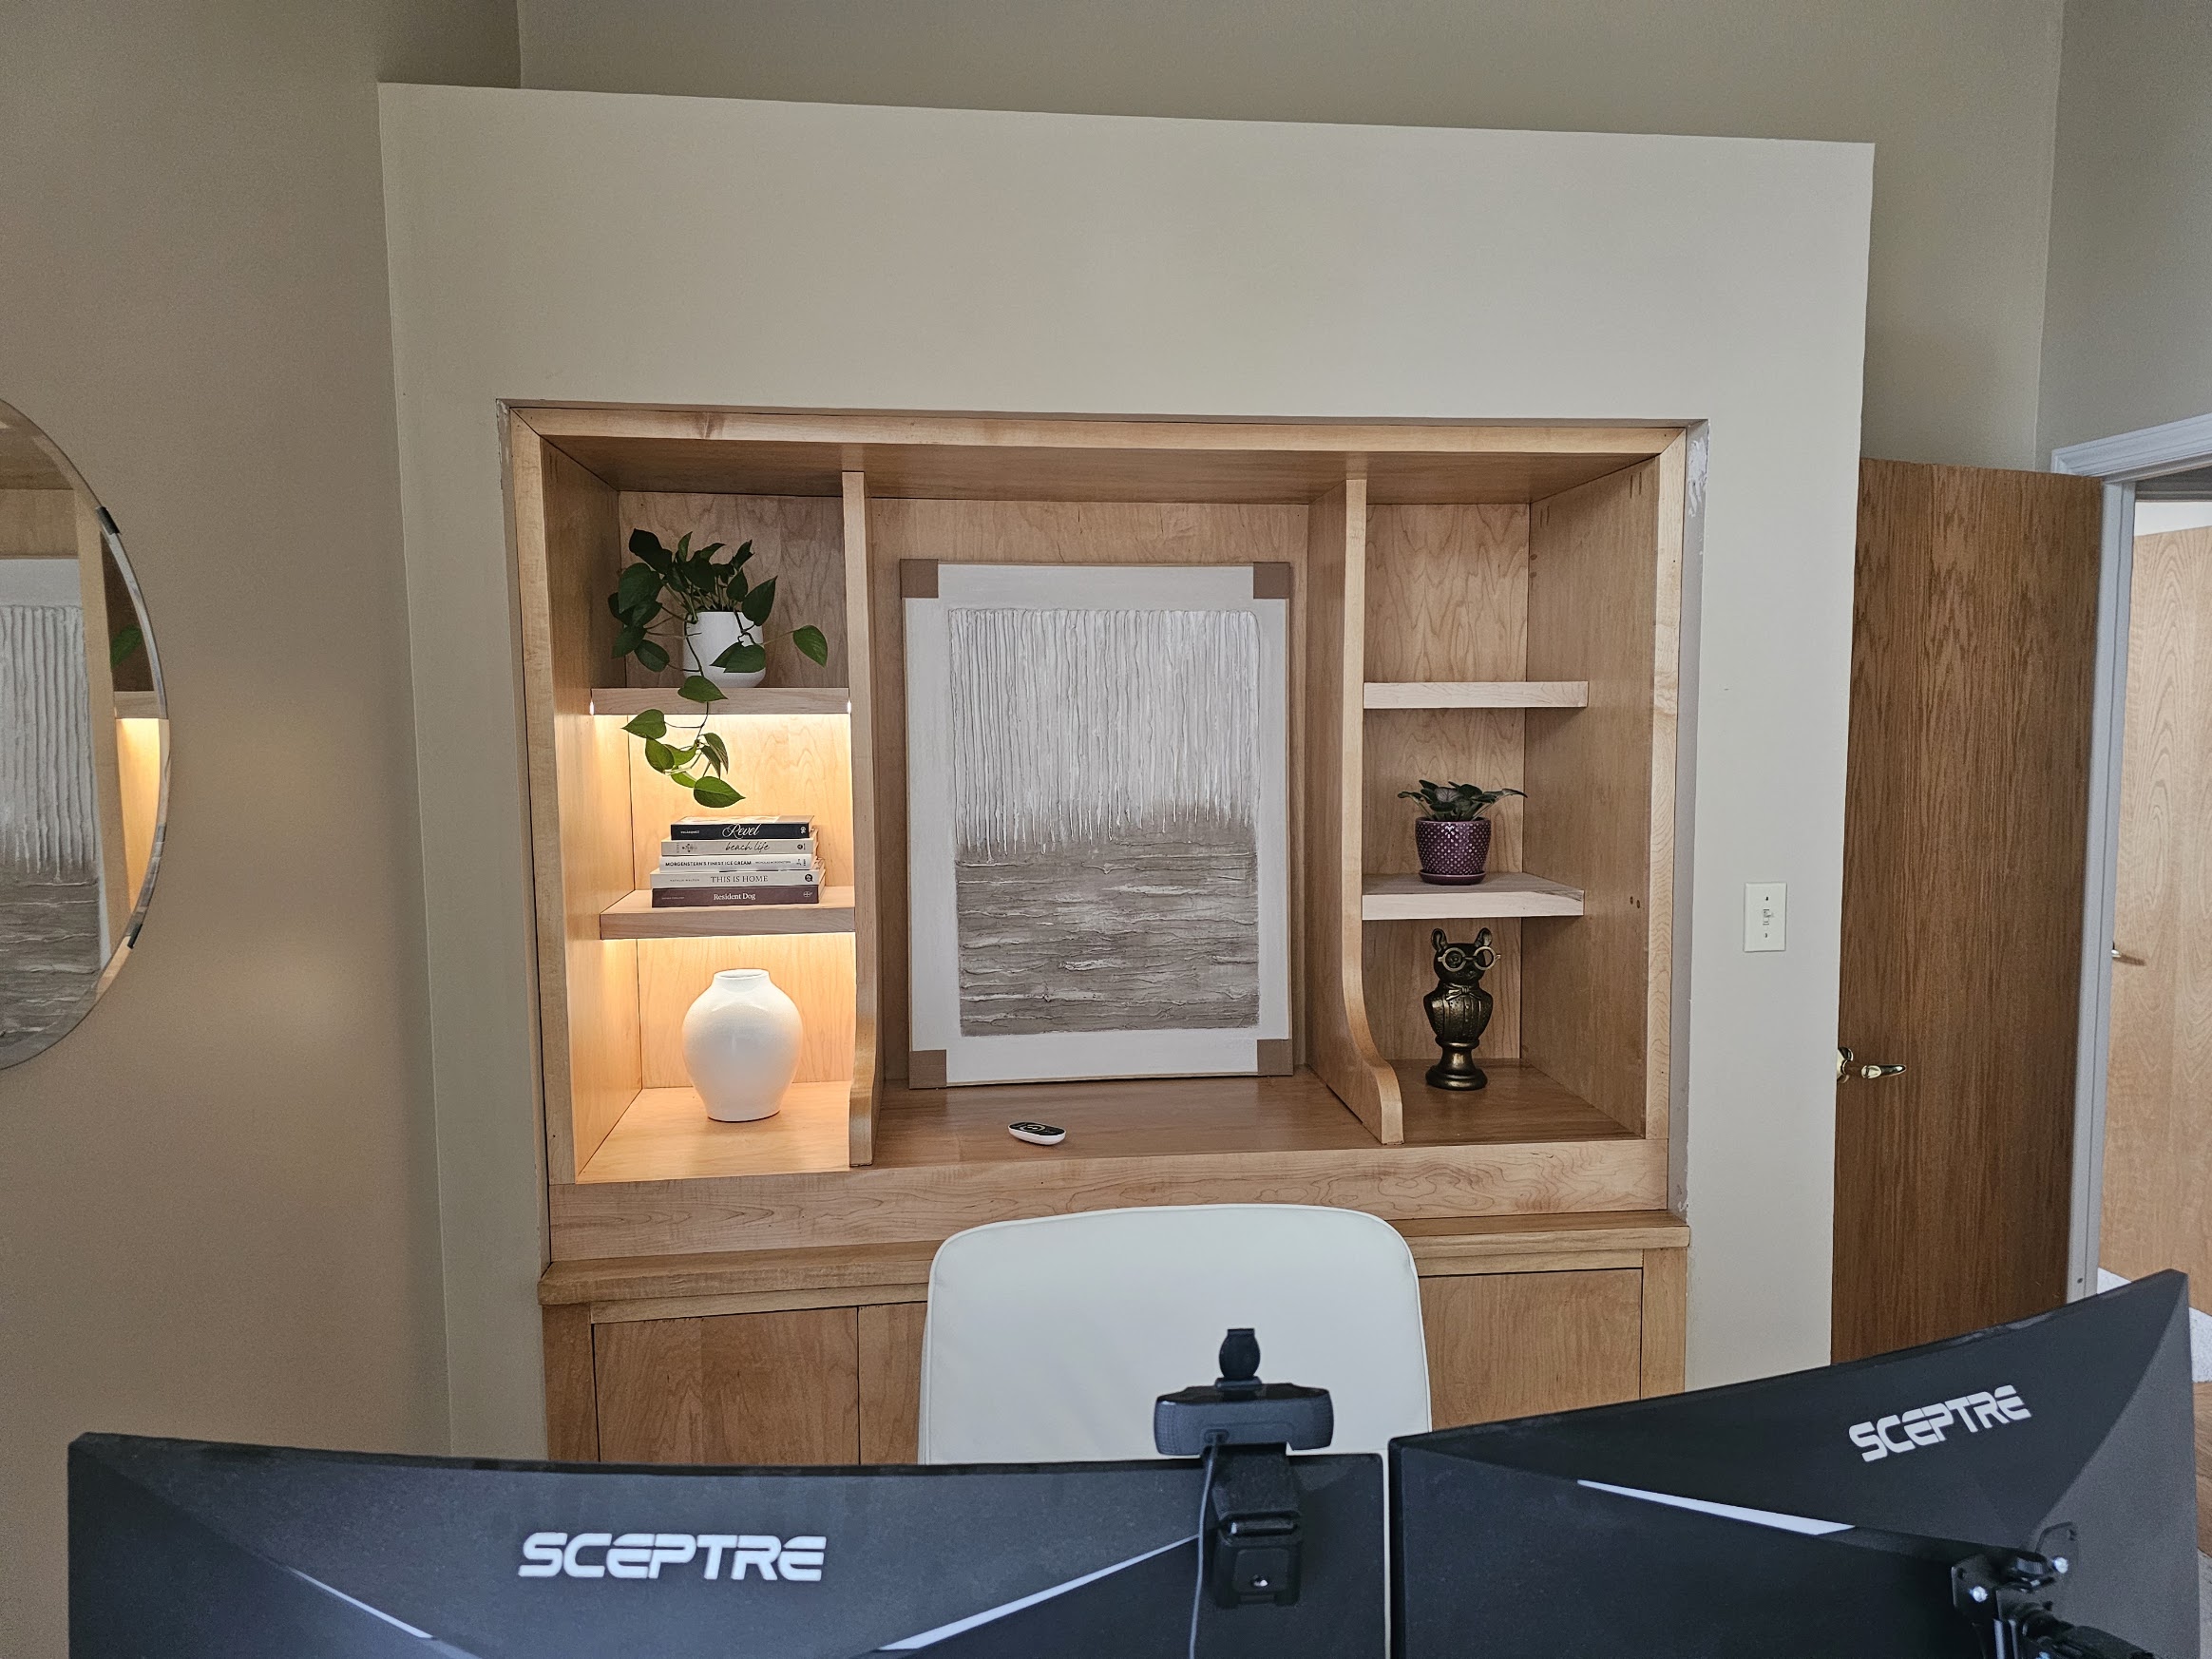 Shelves in, lights on, styled, July 2026
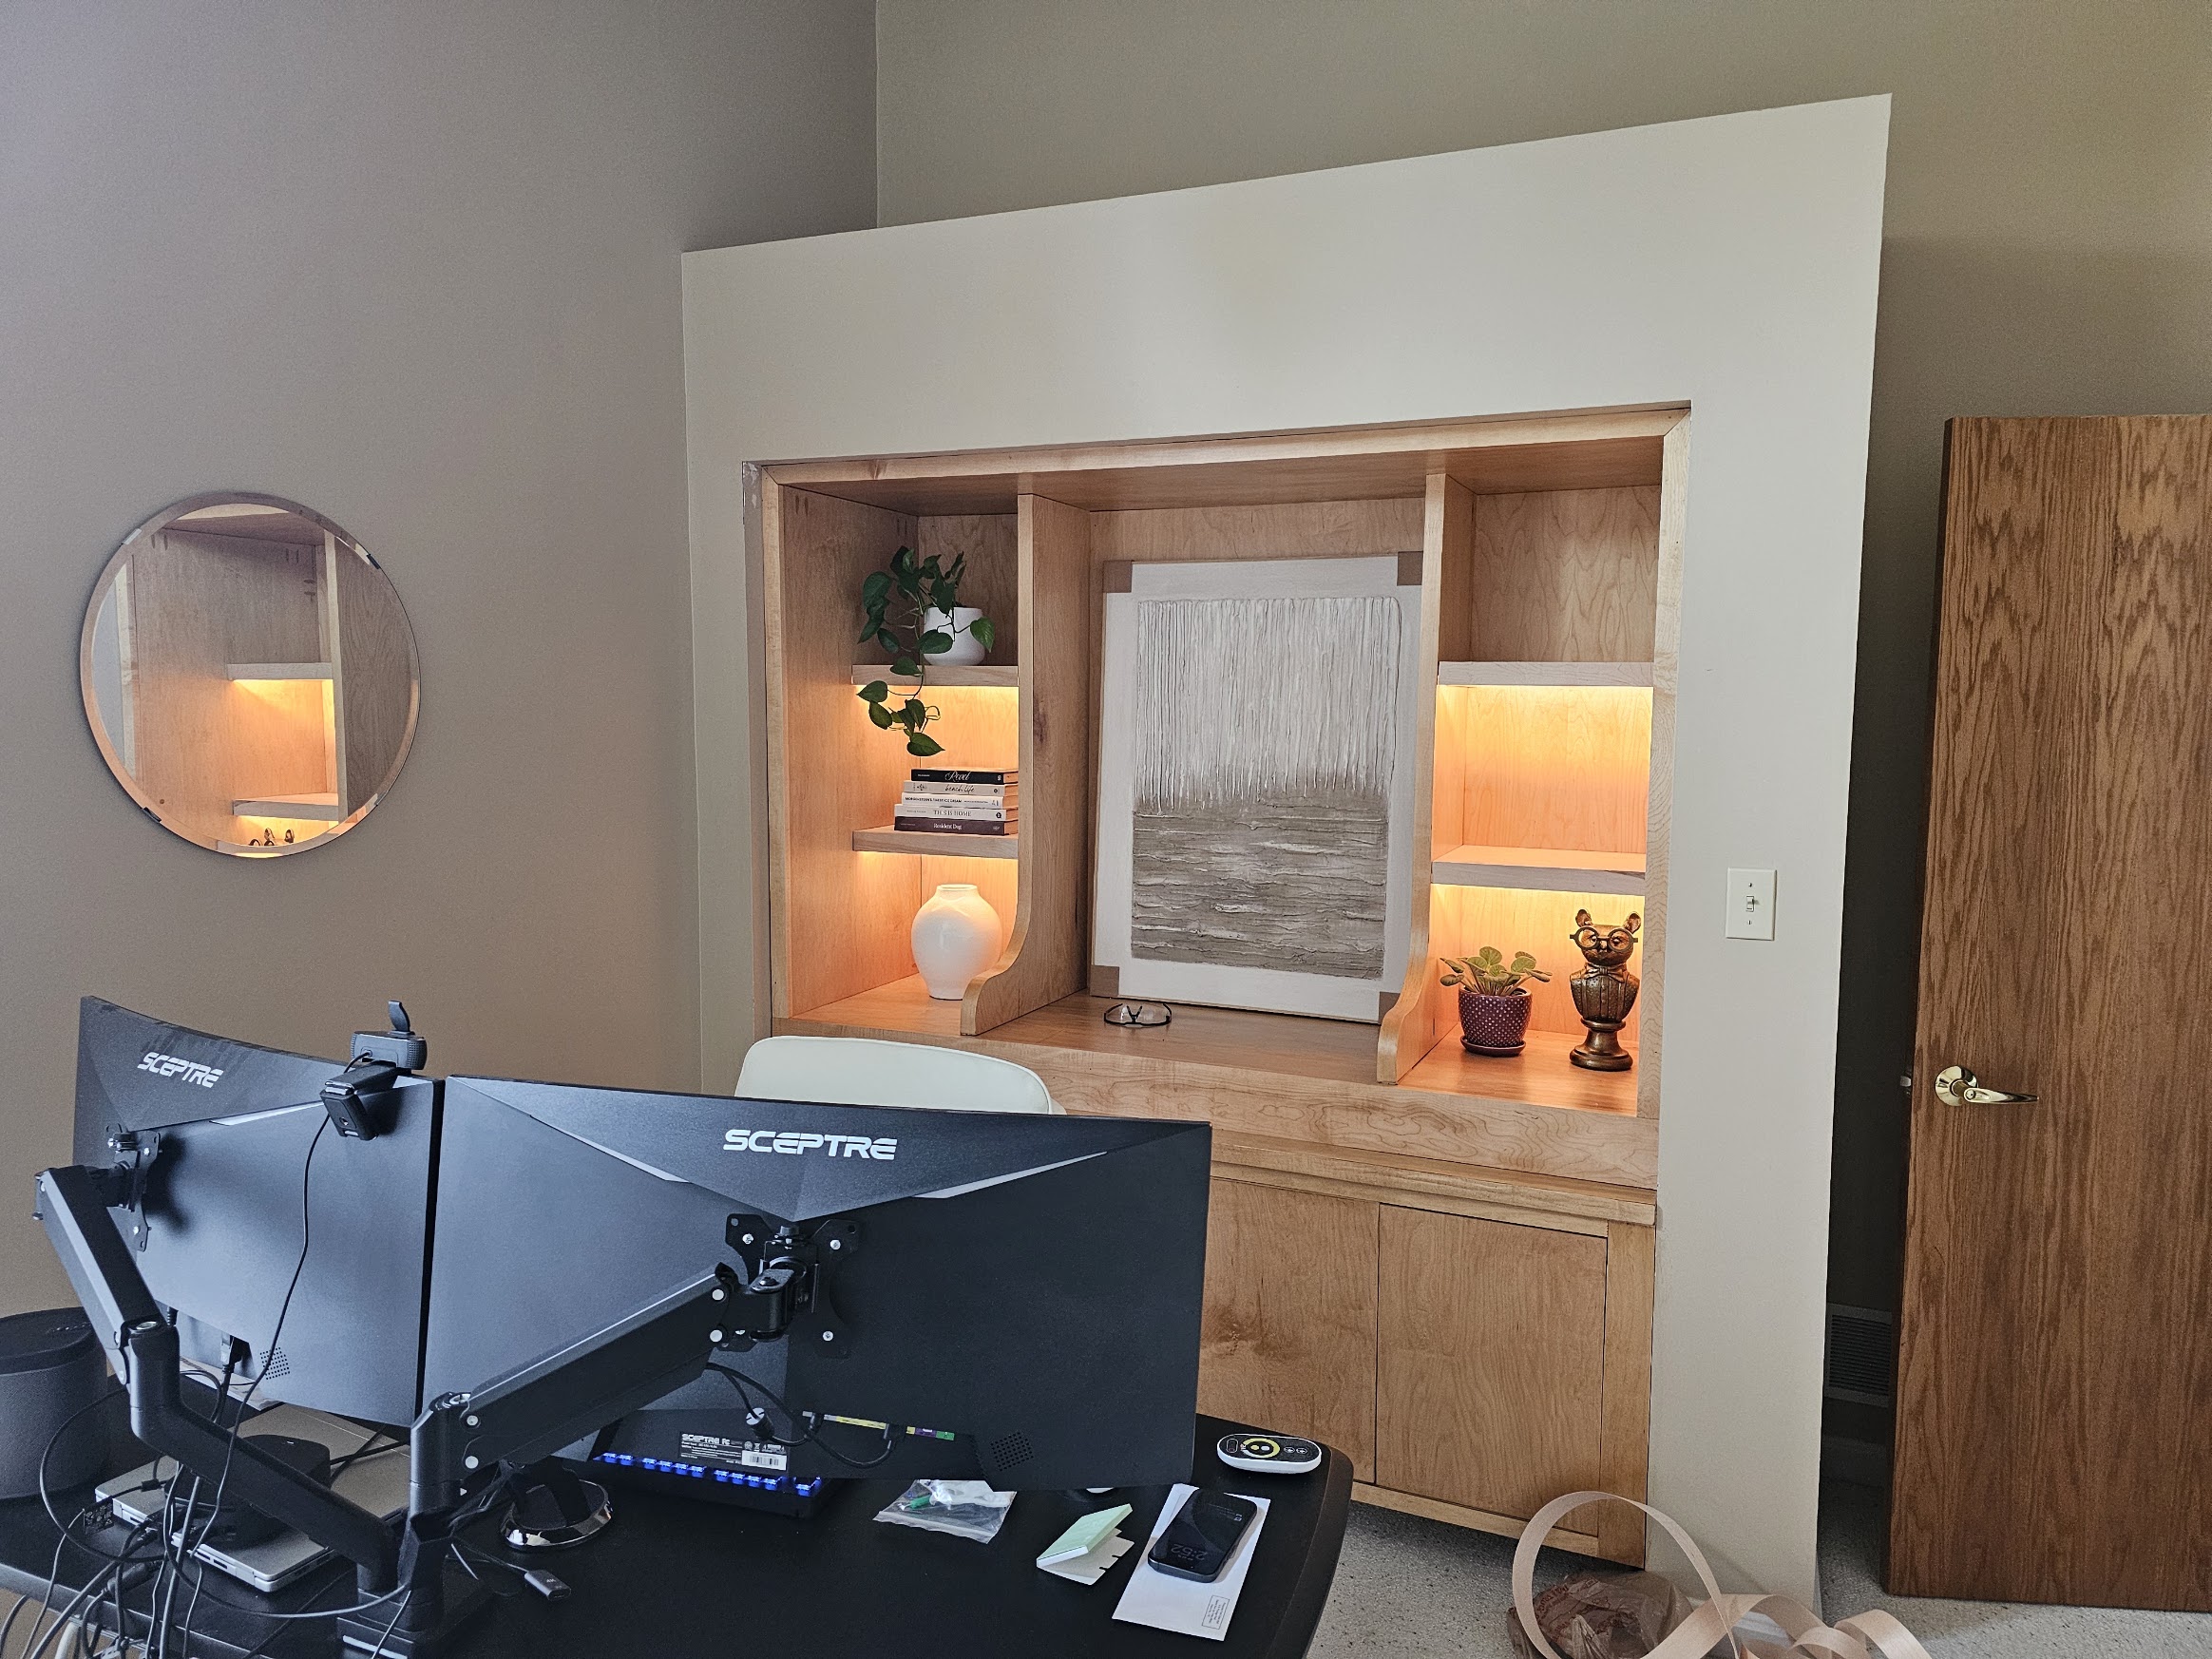 From the desk: the built-in as it appears on camera, with the mirror catching it from the side
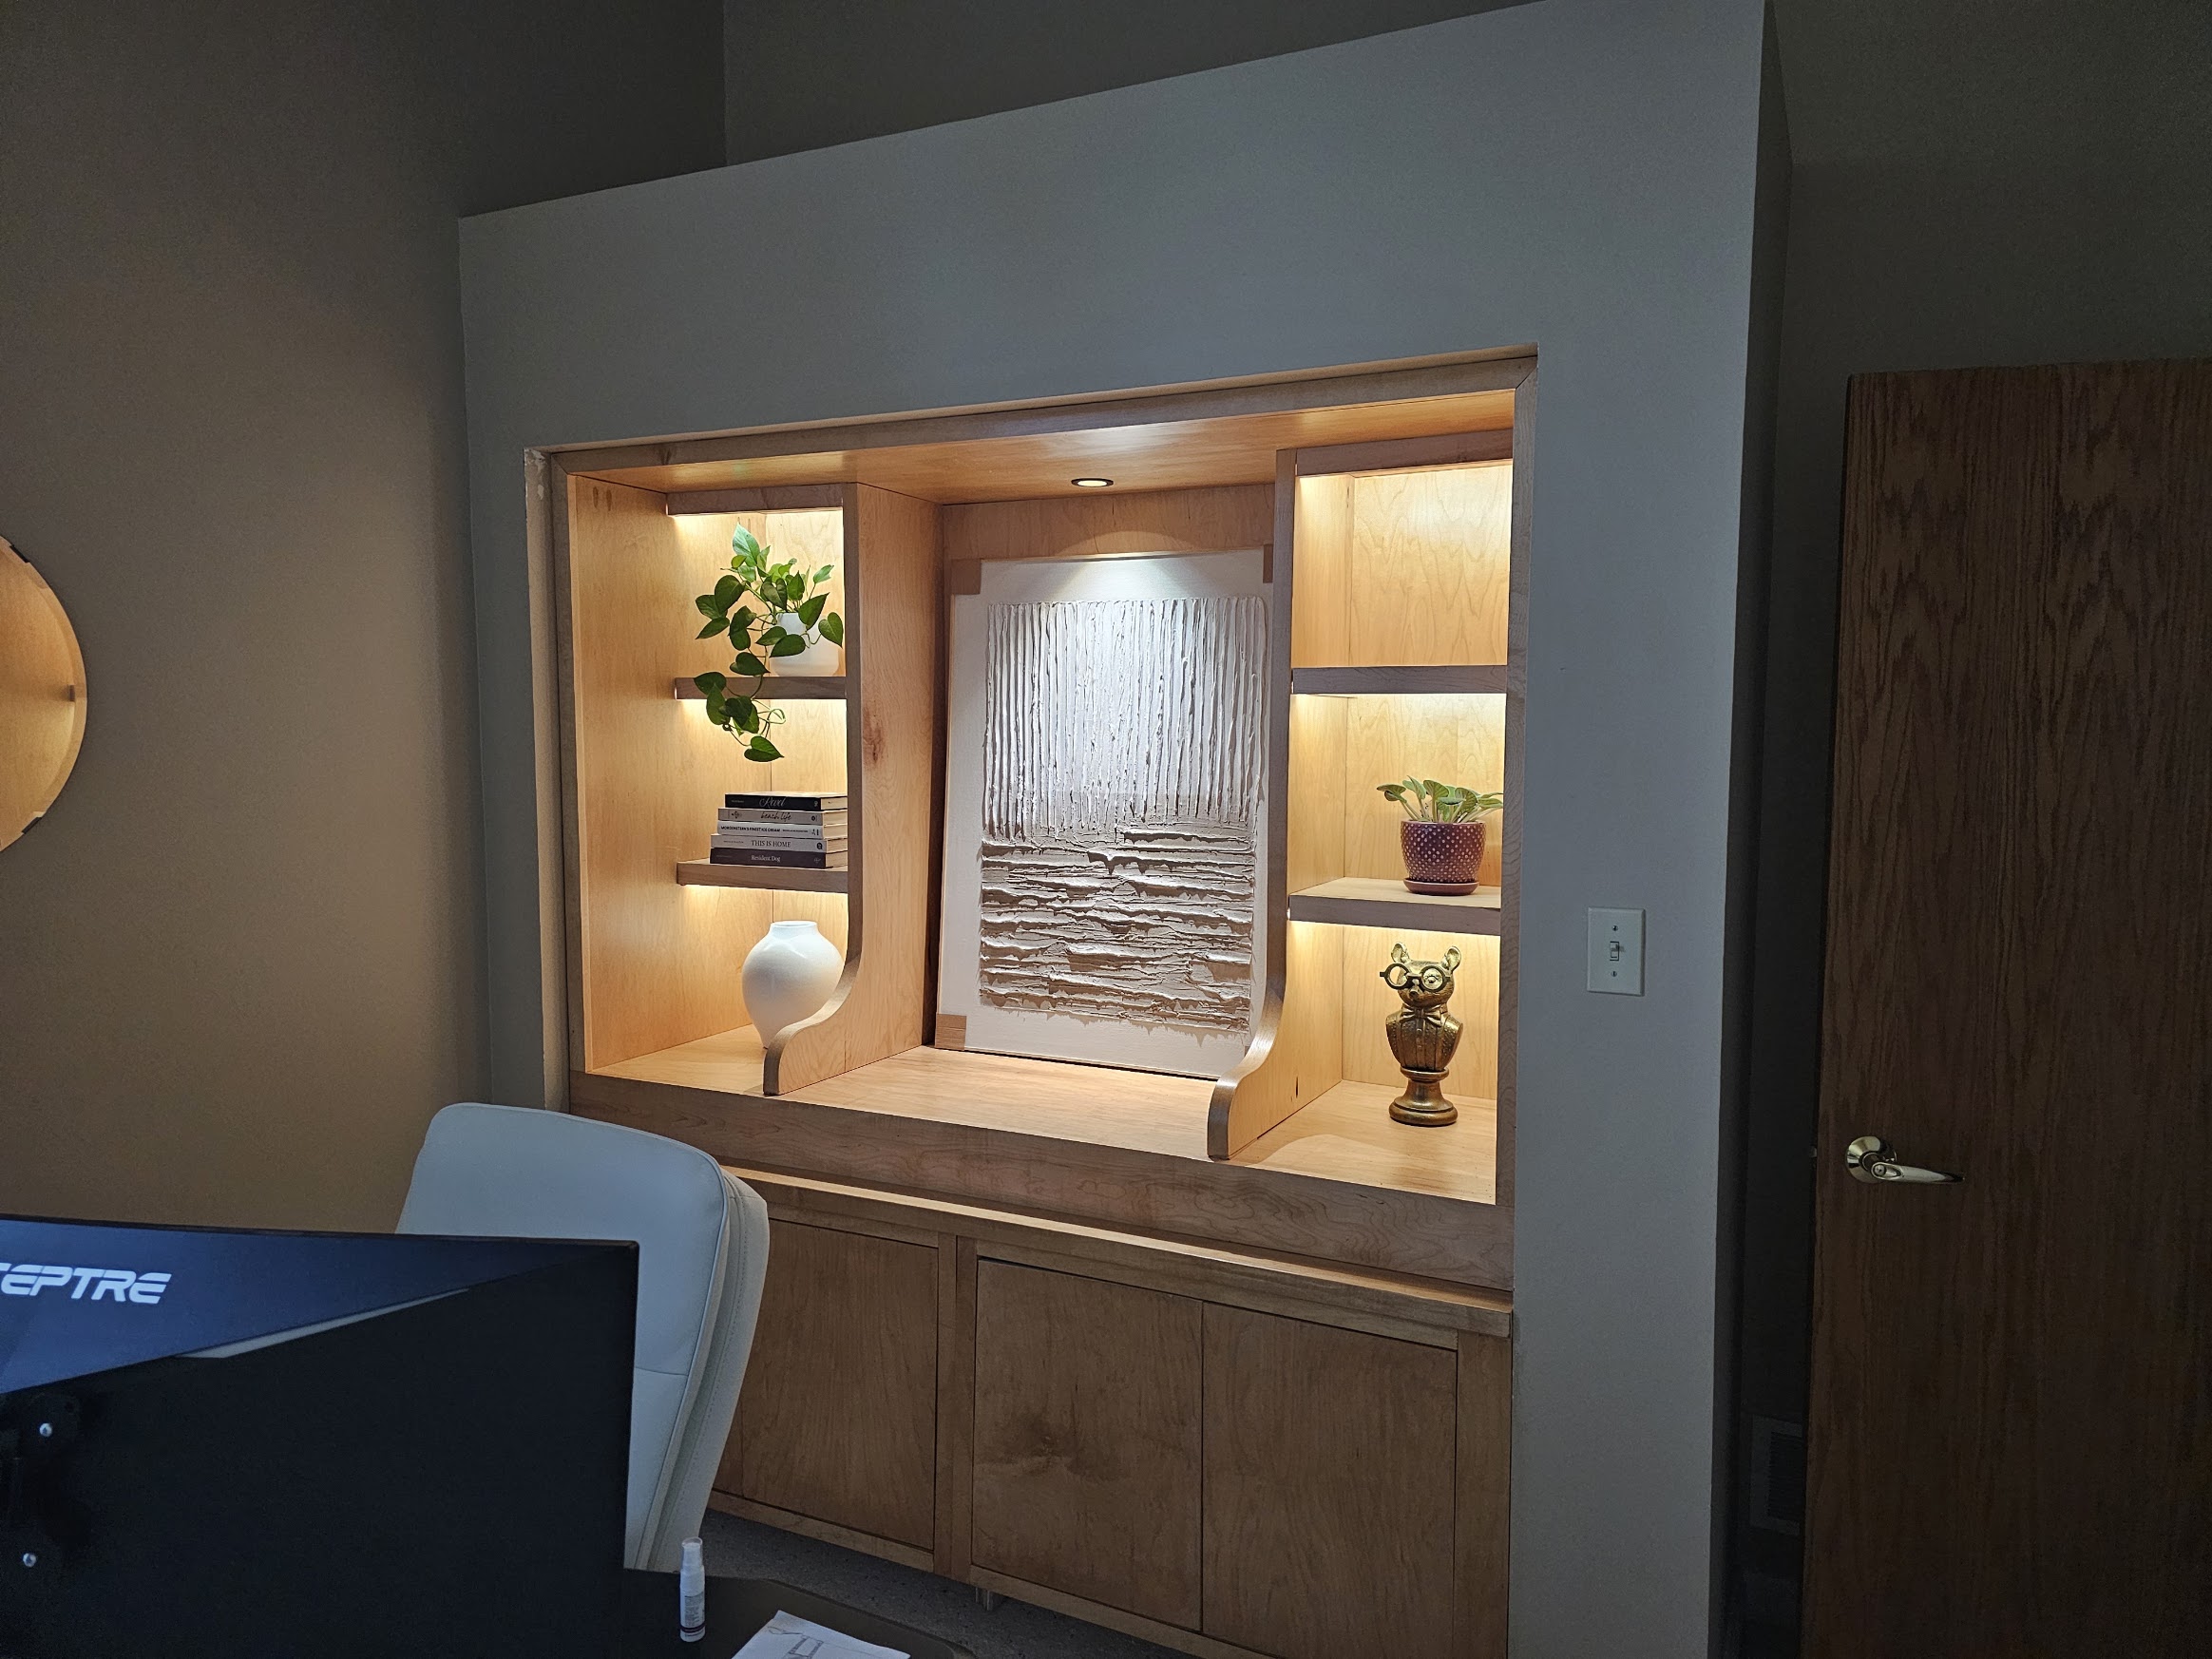 At night with the room lights down, the shelf lighting doing the work, August 2026